jcagle
-
Posts
25 -
Joined
-
Last visited
-
-
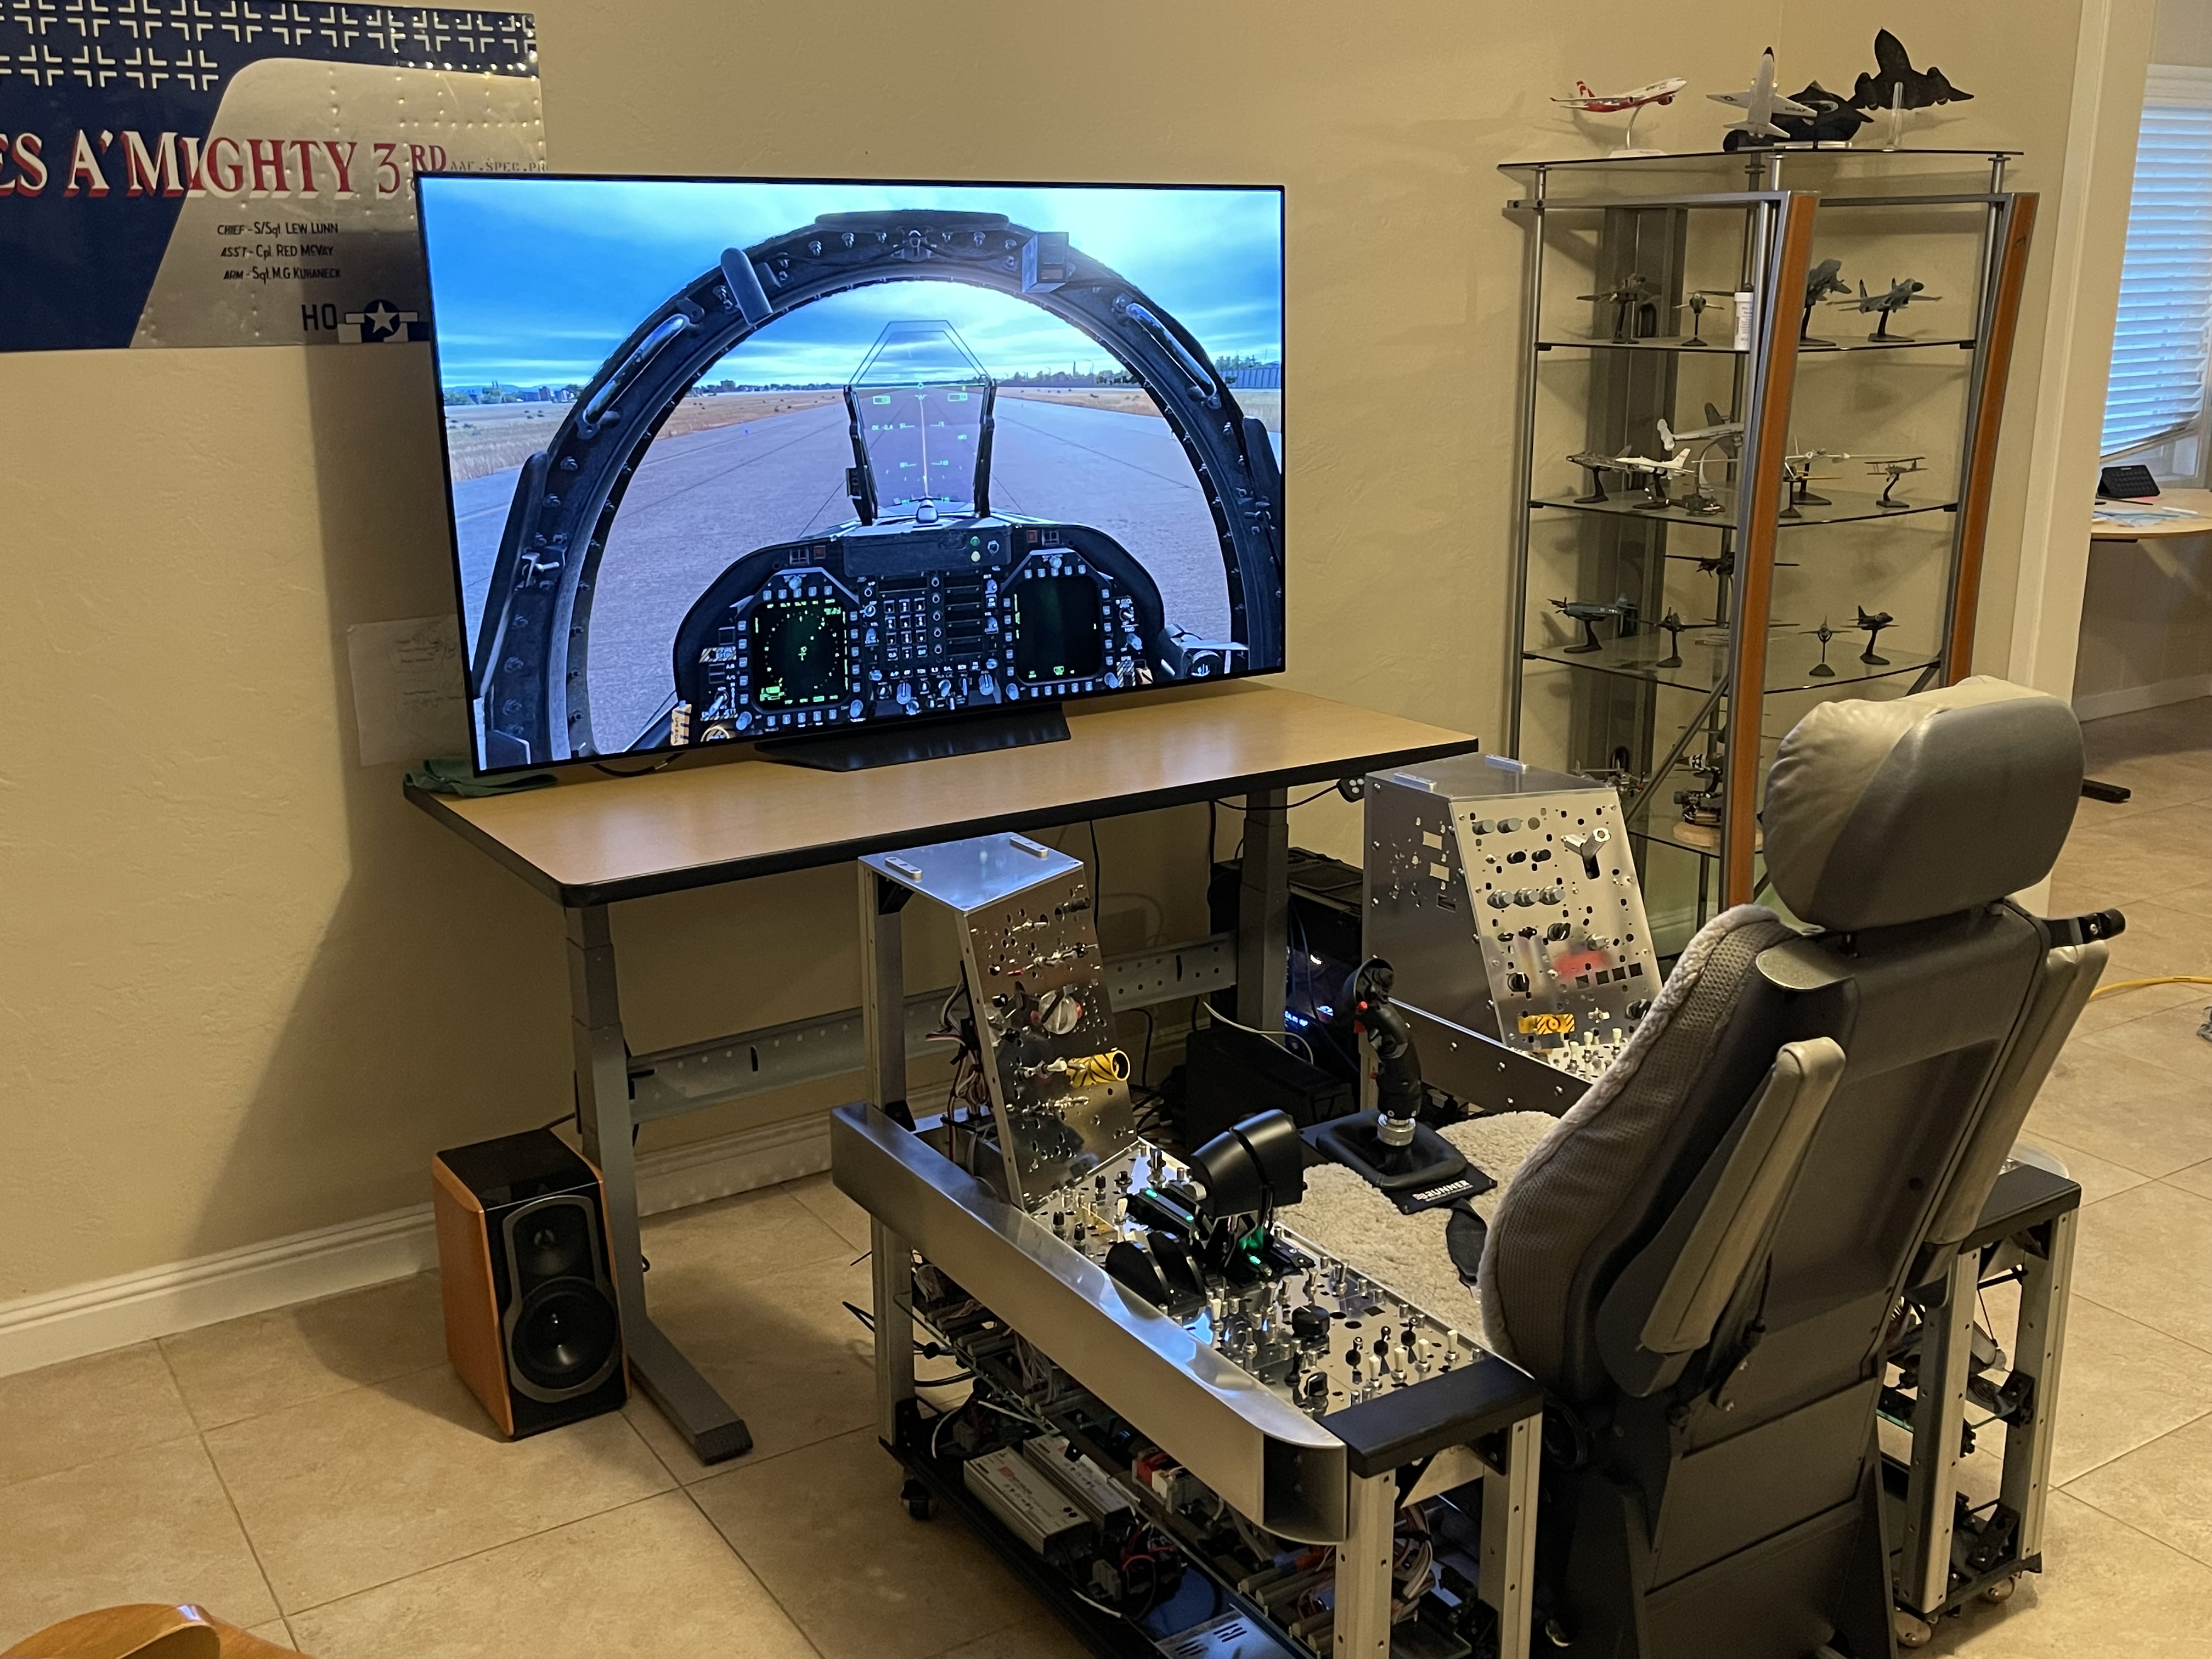
Finally reached feature complete after a little more than four years of part- part- time effort.
-
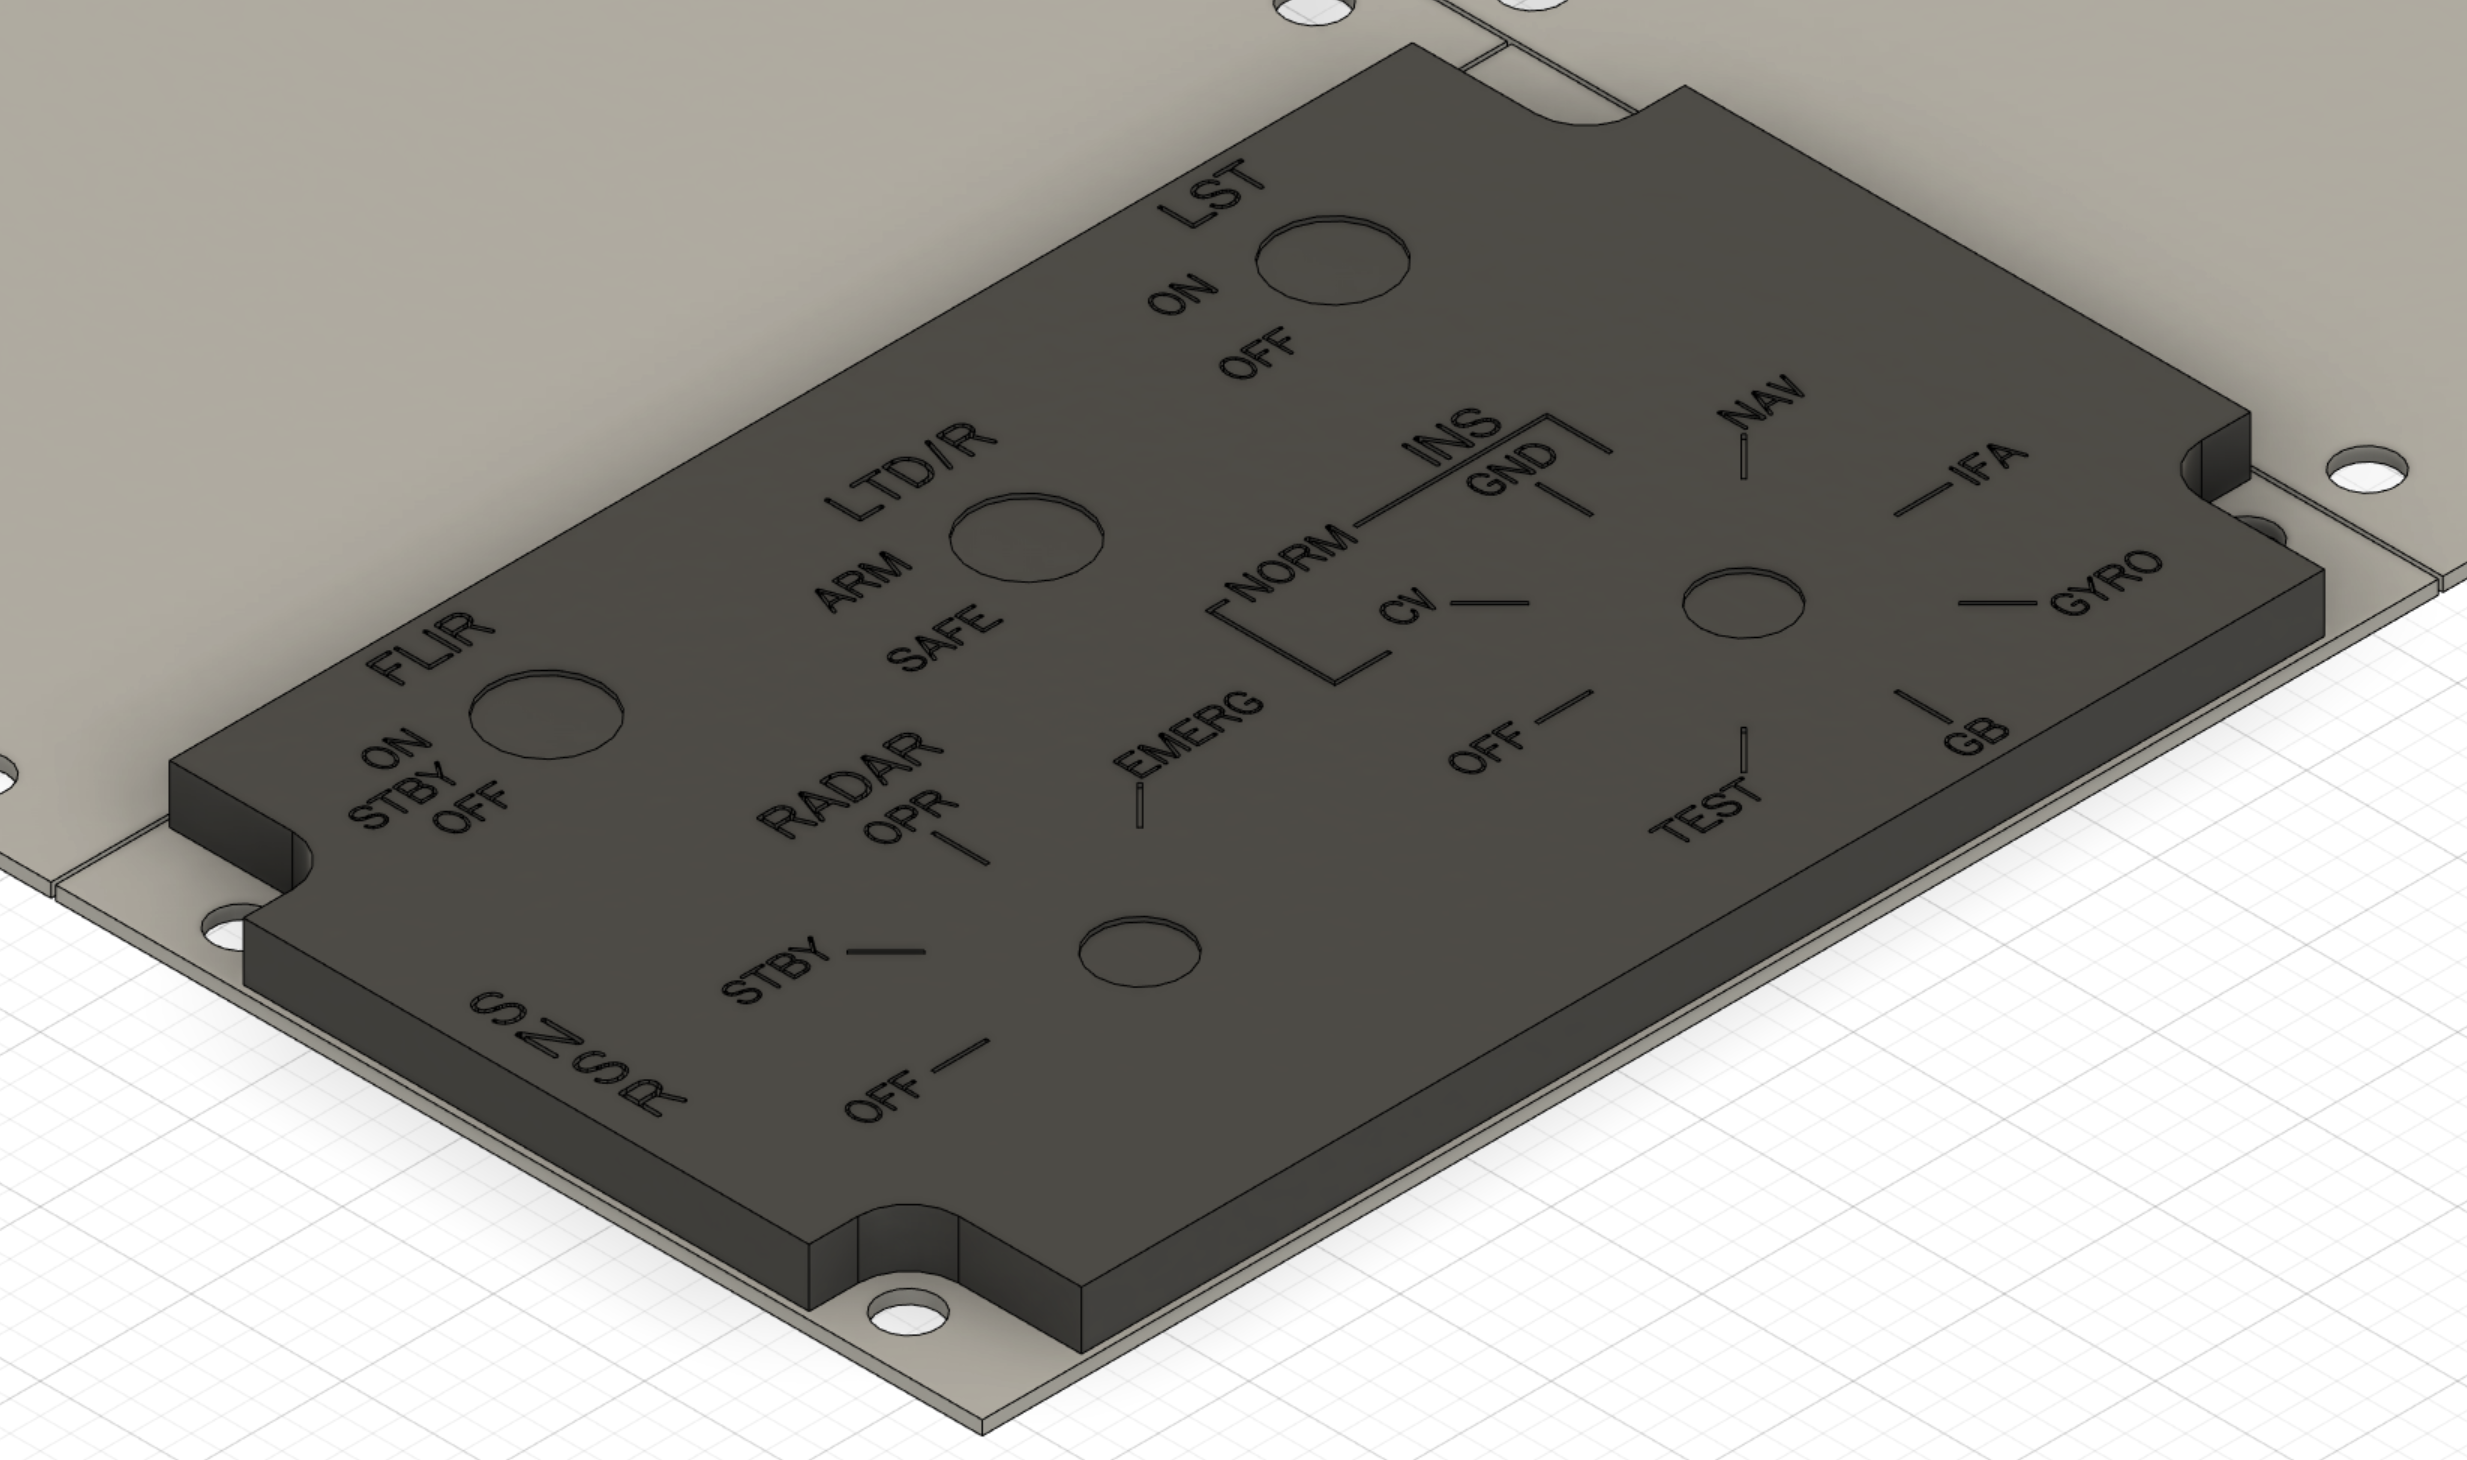
Life has been very busy the last year (wow!). I haven't bee able to document progress very well, but progress has been made. The switch layout is on its third and hopefully final iteration. Panel bases have changed from plastic (prototype) into mirror finish aluminum. This is nearing final iteration and will post some more in the coming months. null null

-
Some larger pieces are finally coming together. Almost ready to begin fabrication, complete F-18 font family built from scratch (sourced from actual F-18 imagery), and narrowing in on paint selection after running through 8 candidates (optimize ease of application, no sanding, and durable).
-
I've been impressed with the general quality and function of the router. Some high-level pro's and con's General - It has a serious learning curve, with probably 3-6 months needed to fully wrap your head around it capabilities and good technique - Very capable in soft materials (wood/plastic), but at its limit with aluminum....you really need to be dialed with the tool to have good results - As always, good cutters from solid carbide are worth the investment - While Shaper does sell a base, I found it necessary to make own to really get the most out of the tool (see above). Fixture building for part cutting seems to be a routine need in projects. Pro's: - Robust design from hardware to software. Probably the best example is that there is no shutdown procedure, just yank out the power cord whenever you are done. It remembers where you were and what you did. Really thoughtful design for work environments where circuit breakers trip without warning. - Good general accuracy in X-Y plane (part edges), though it does take a good understanding of referencing and datums. - Outstanding accuracy in depth and small features (e.g. holes) - it nails the transition in fits from press->slip->loose Con's - 2D only, it's best to think of it as a free-form water jet or laser cutter that's not bound by spatial requirements, and you have a cutter to determine the path profile - 3D is not really a feature limit: you can easily offset paths per depth, or with datums it's possible rapidly and accurately place varying contours with different depths - 3D is really limited by human hours (you have to walk it through every pass) and the router supports its mass directly on the work piece, so it would start to get unstable if you made a topographic map (as an example). - From above, the router support its mass on the work piece and will scratch more polished/finished surfaces if they are soft.
-
Since this is a generalized cockpit, there are no specific switch layouts to follow. Starting with the all-important CAD prototype (Ref: Project Binky), panel sizes and layouts are on a third revision and getting close enough to start moving towards design and fabrication of the frames.
-
After quite a few months, the seat is complete:
-
The font was made from scratch, using a pseudo telecentric image of the F/A-18 panel I posted above. Letters were cropped and calibrated based on size and then imported into a Font Builder where they were drawn/digitized one letter at a time (sample below). So I am not sure how directly the font features we've built will translate to the MS33558 font. Also, as with all things hobby.....it's not finished yet! I have some sources for numbers, but would like them to be better.
-
Great, thanks for the advice! Have a working font set with reasonable (major) spacing, but as you noted, could put more time into kerning.
-
AH, looks like this is the solution: https://www.youtube.com/watch?v=3clIXZu1eKU&t=229s
-
How was this process completed? Let's say you stumbled across a couple of real world F/A-18 panels, and then used a 600mm telephoto lens to take an orthographic image, and had a very patient wife who created a font based on size-calibrated images. BUT, then had the same issue with the font software and could only display, rather than cut in CAD.
-
In a search for center-mount seat concepts, I stumbled across a pilot's seat complete with a 5-point harness sitting in someone's garage, and for too good of a deal to pass up. Here is a quick-attach assembly for the flight stick. Probably a month out, but the next project is to build a base for the seat and a quick-attach for a rudder plate.
-
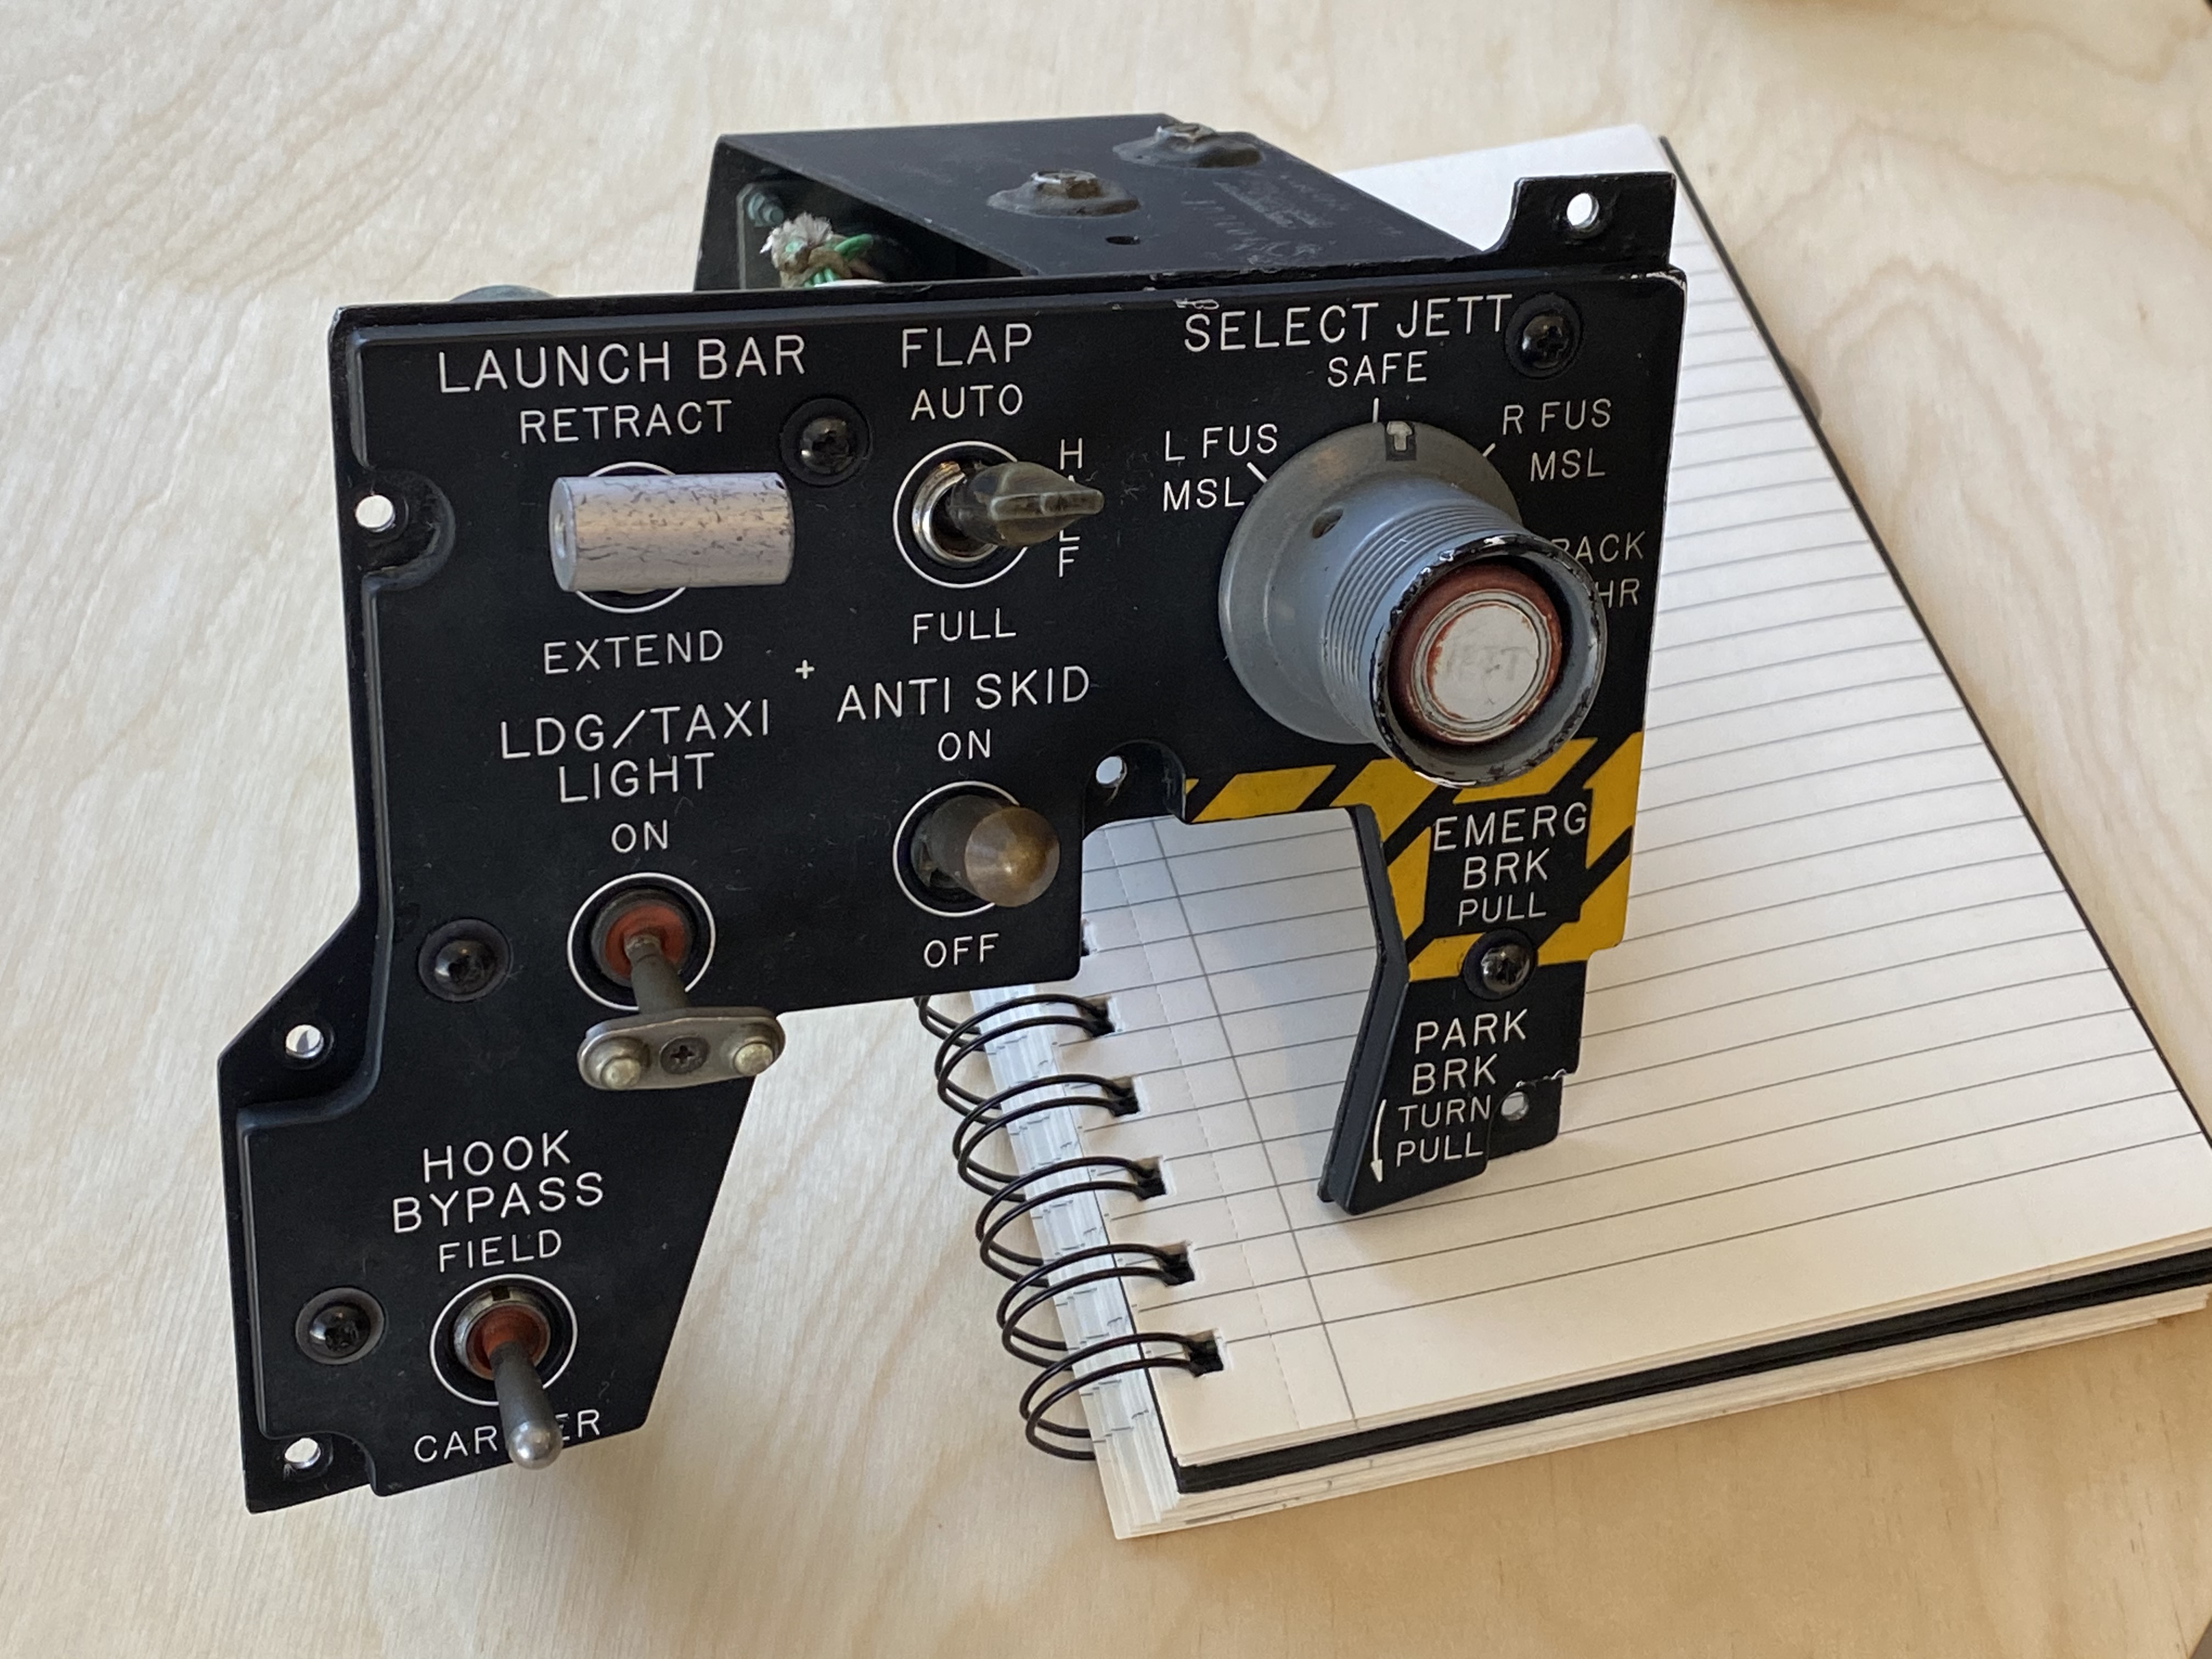
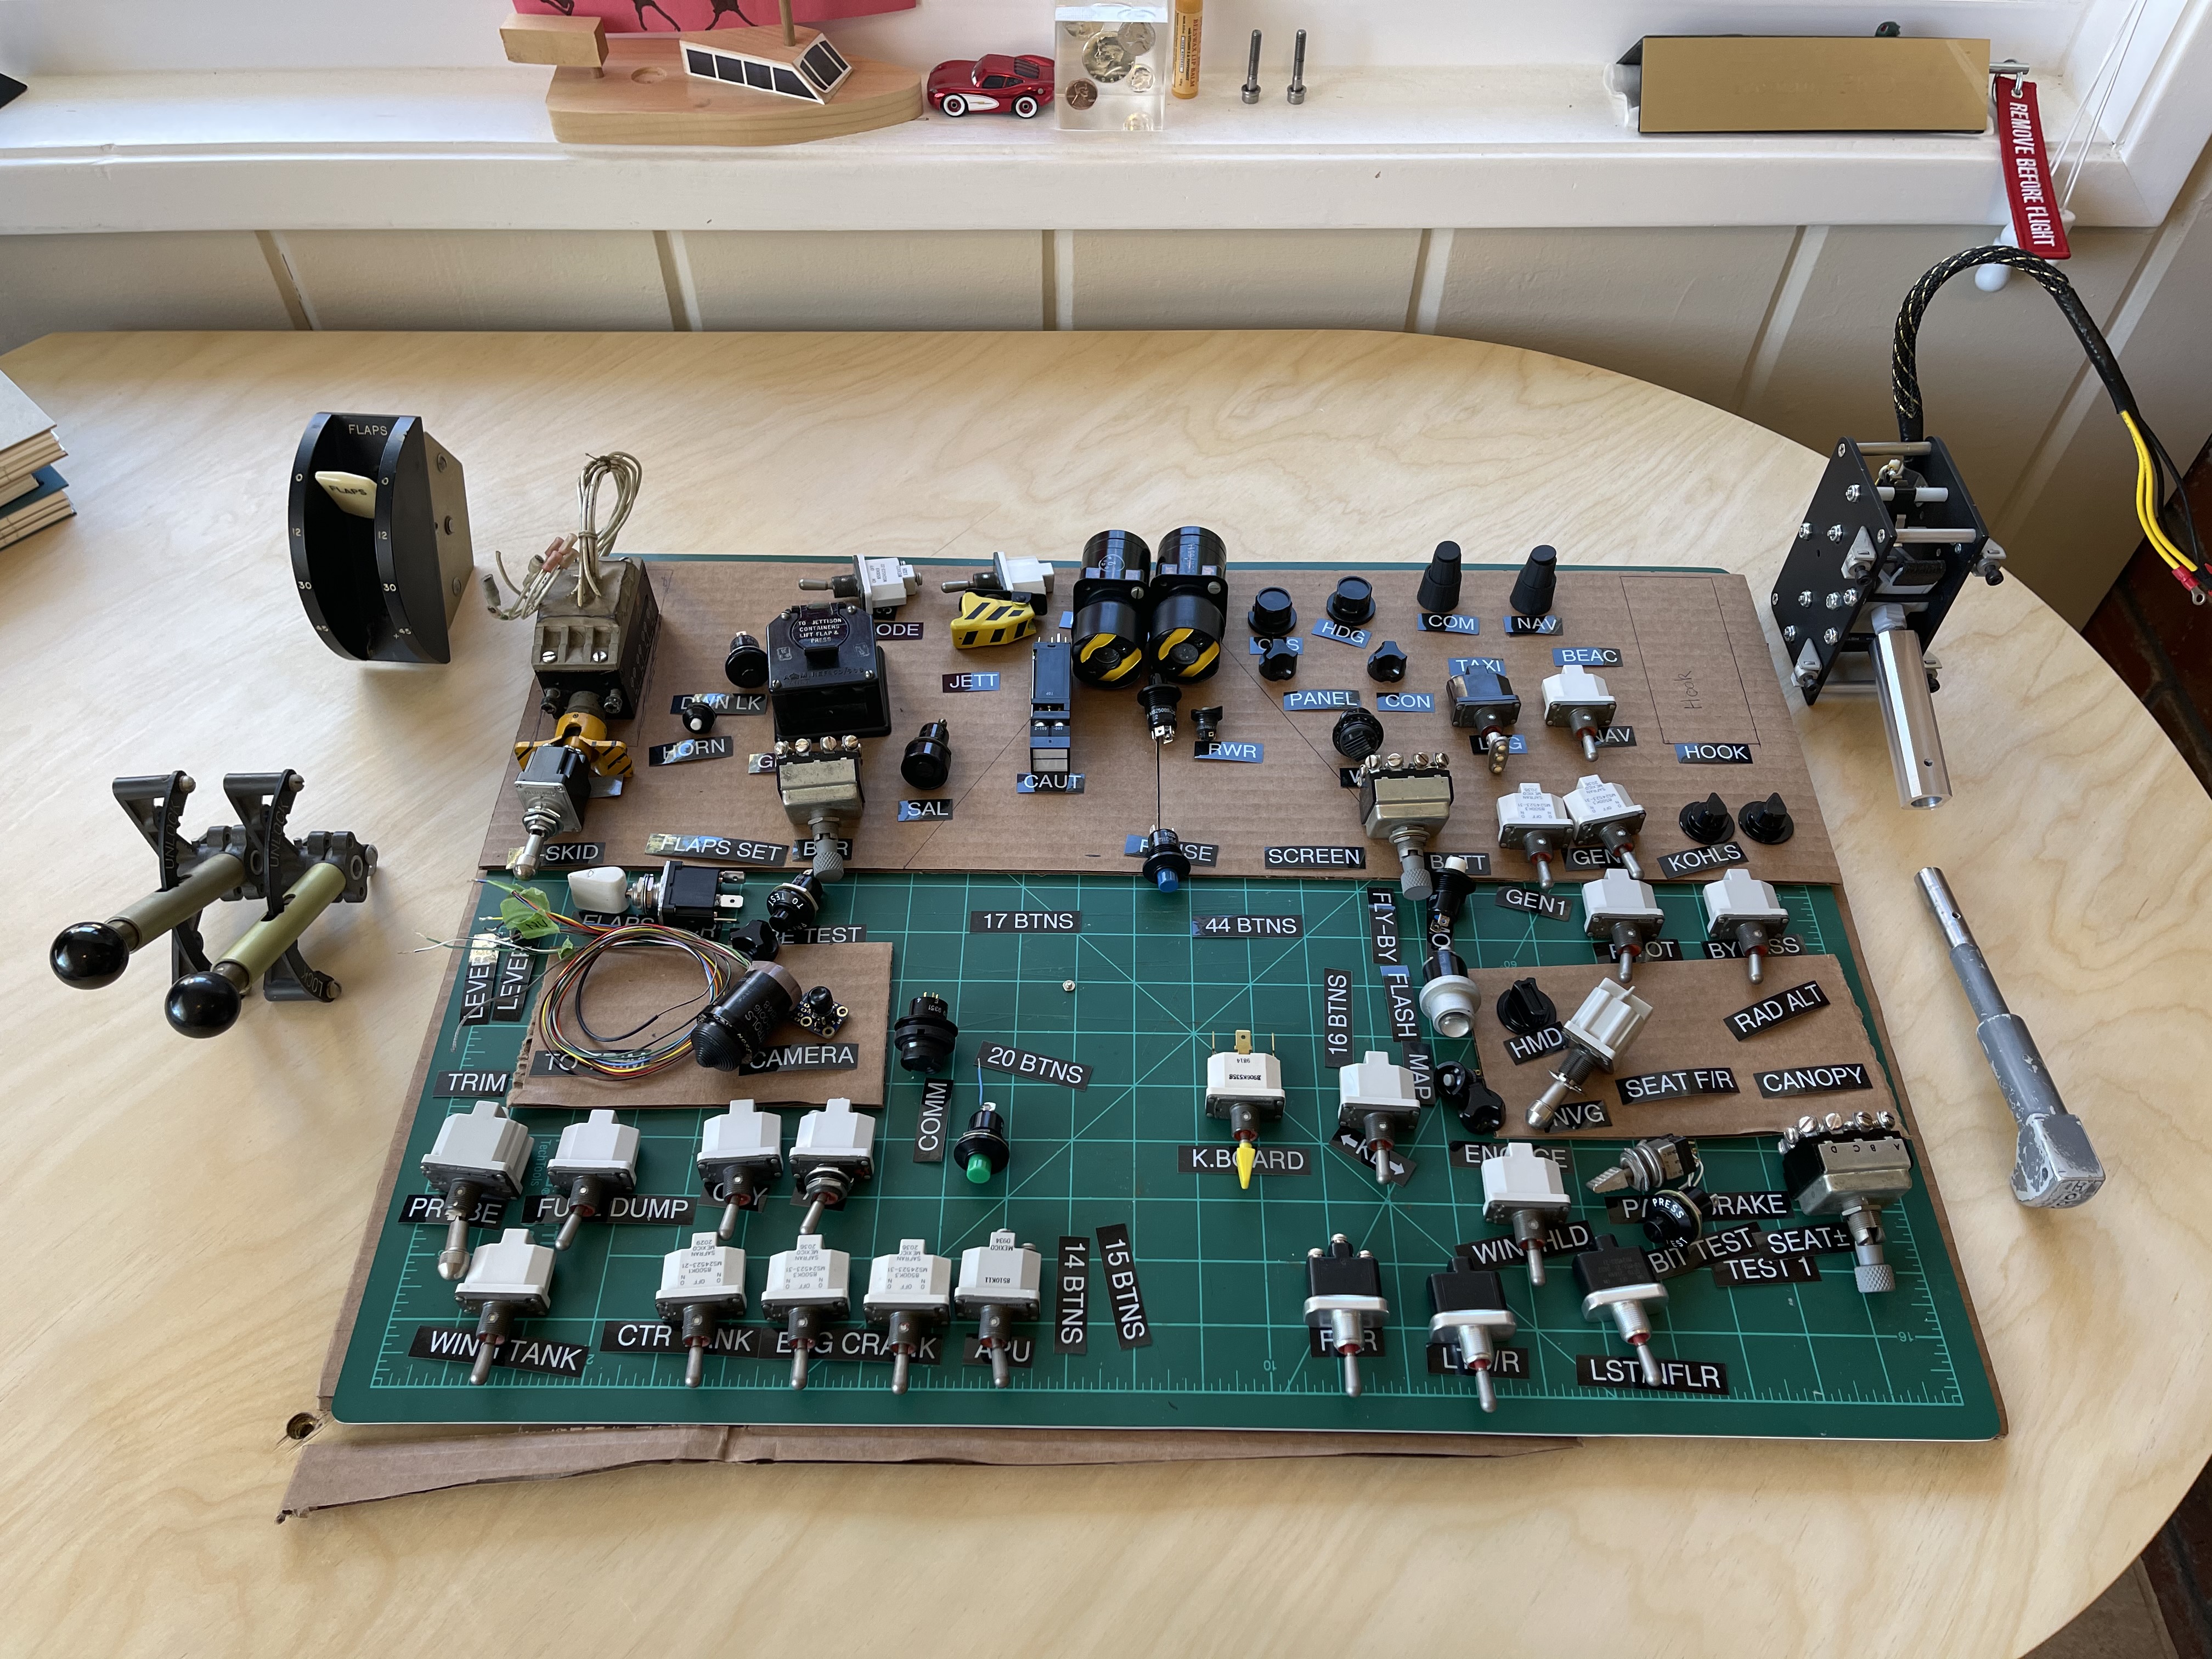
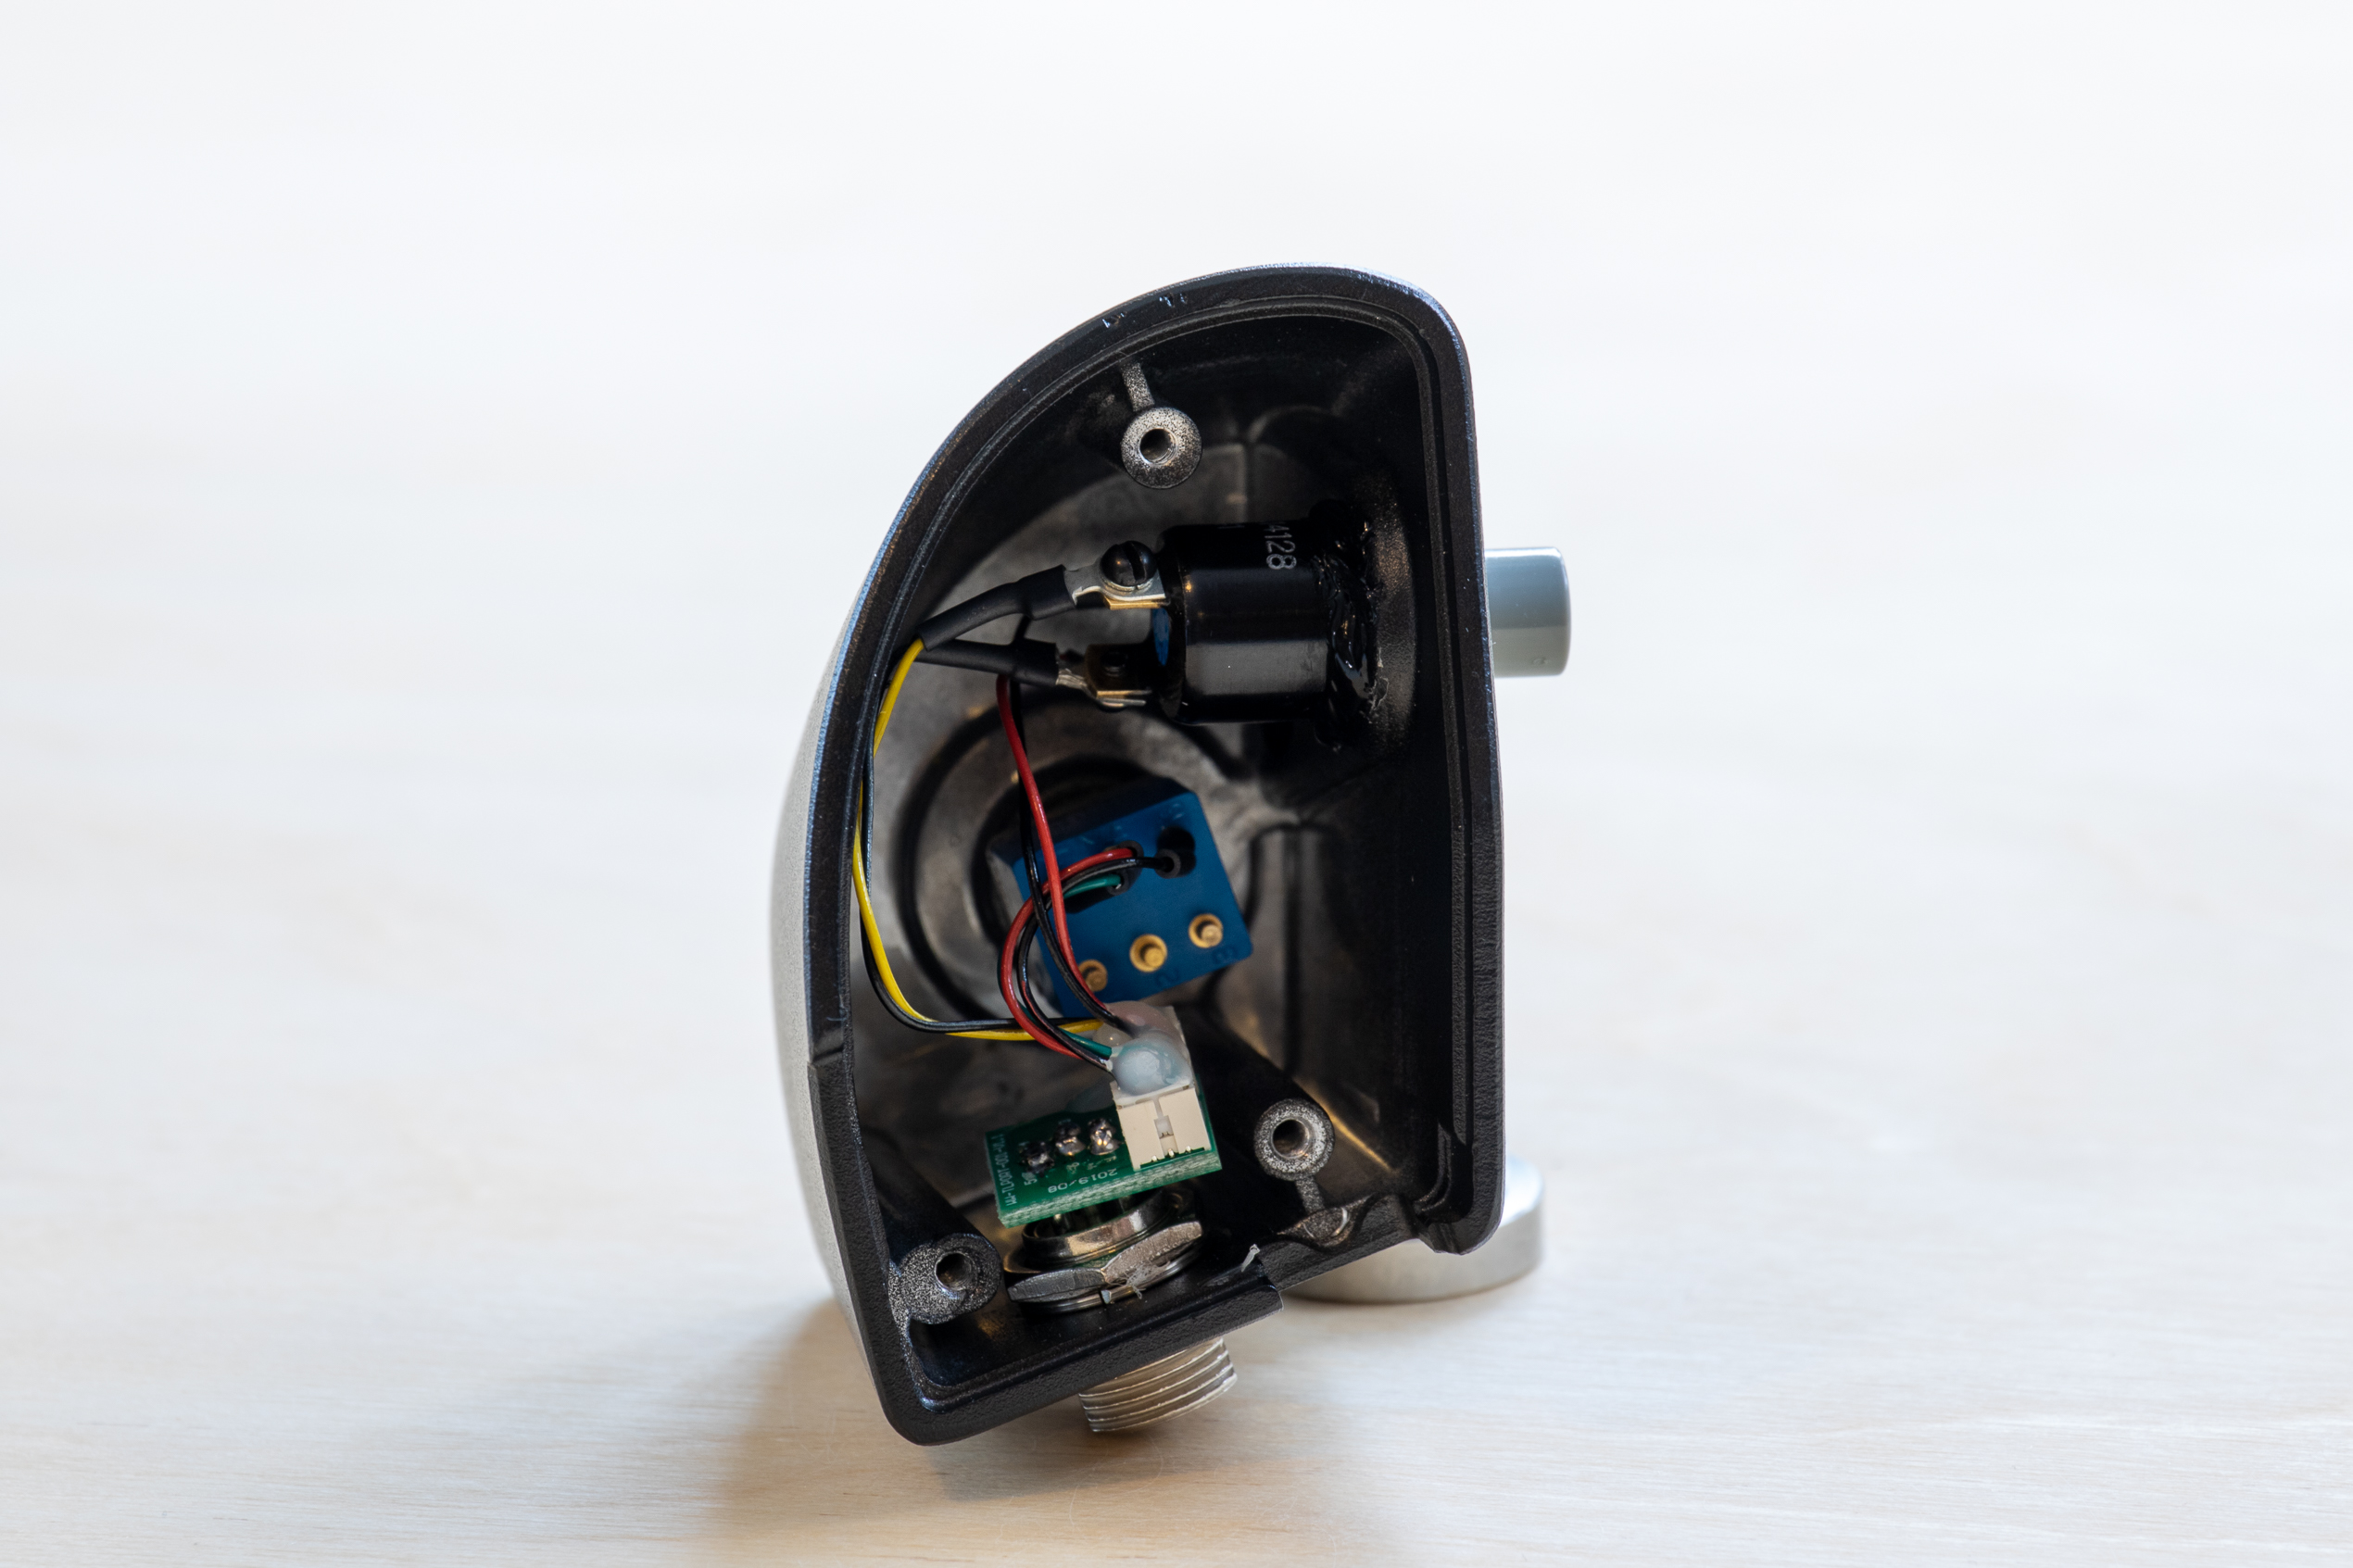
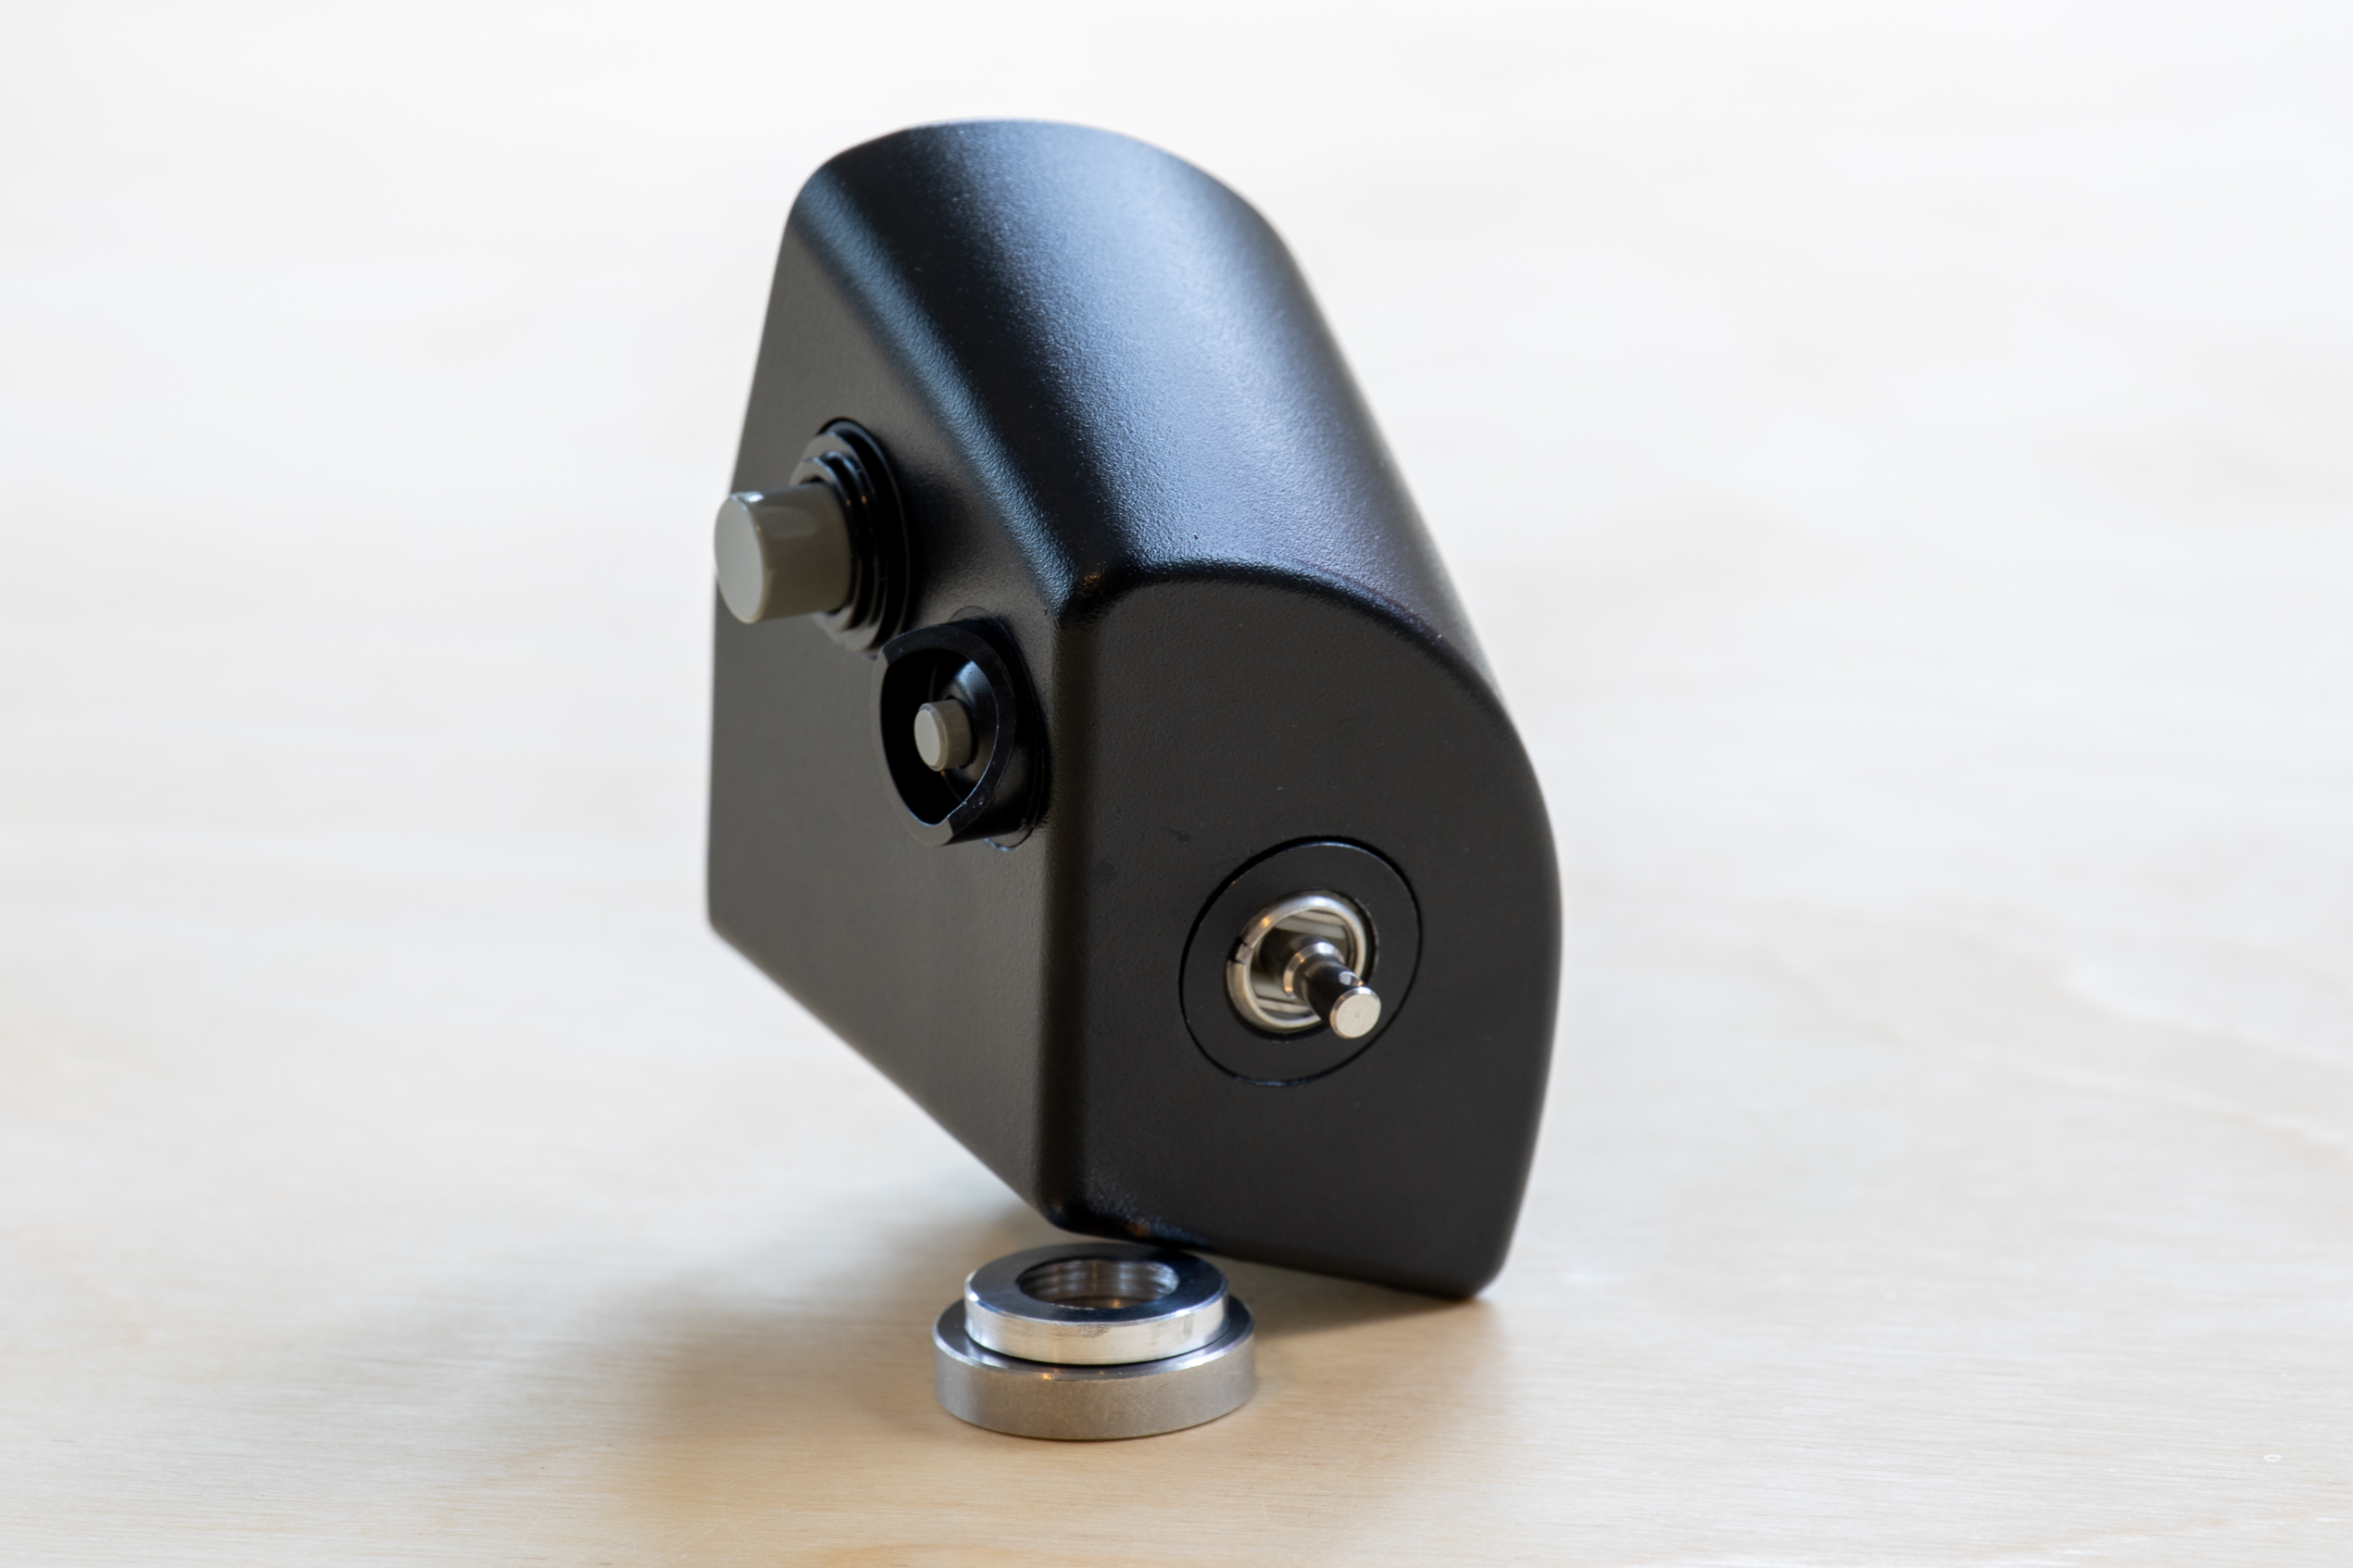
Hello All, I was sitting with a keyboard in lap back in October and reached a tipping point. I was tired of looking down to find keys, constantly breaking immersion. So, I started buying switches and laying them out on carboard cut-outs. Two months later, and this is where I'm at. Next is the task of hooking things up in a methodical way (I am an engineer, and it should be noted that the real world F/A-18 HOOK lever is attached to the sim base via personally milled aluminum adapter). I will be sporadically posting images in the months to come. It won't be much of a "How to" but hopefully some motivation for others of a similar mindset. First project was a minor reworking of the excellent WinWing Hornet throttle by integrated 3x Otto switches. In absence of a boat switch on the F/A-18, I thought it would be a nice addition when flying the A-10C. The push-button switches were also selected to be distinct so there is no tactile confusion about which is being pressed. Adapter collars were turned out of 3/4" aluminum rod.
-
Update, it was the Navy Equipment mod.....I should have known better. :balloon:
-
Okay, on the way to finding the problem. - Confirmed that the files in CoreMods/Tech/USS-Nimitz are 2.6 GB - I have some mods in the Saved Games directory and wiping that seems to have fixed the issue Thanks for your help!