Zoren
-
Posts
15 -
Joined
-
Last visited
Content Type
Profiles
Forums
Events
Everything posted by Zoren
-
What I did using Blender was to create a cube of a size of one of the panels, let's say 150mm x 100mm x 10mm (height not important yet...). Scaled my image of the Hornet panels to match the cube's size. Then I would create the panel using the imported image to map too. For the height, I guessed on it as they are not that thick. Then I would export the object into something that my 3D printer software liked and went from there. It worked for me.
-
Look in the file options.lua under the ["graphics"] section, there should be ["height"] = xxxx, change that to your monitors default setting like 1080. And there is also the ["width"] = xxxx, change this to match your monitor width most likely 1920. c:\users\<username>\Saved Games\DCS\Config c:\users\<username>\Saved Games\DCS.openbeta\Config Hope this helps. You can use this file too if you get stuck in VR mode and don't want it starting in VR.
-
What is the DCS resolution set to?
-
What's the G rating on the added cup holder?
-
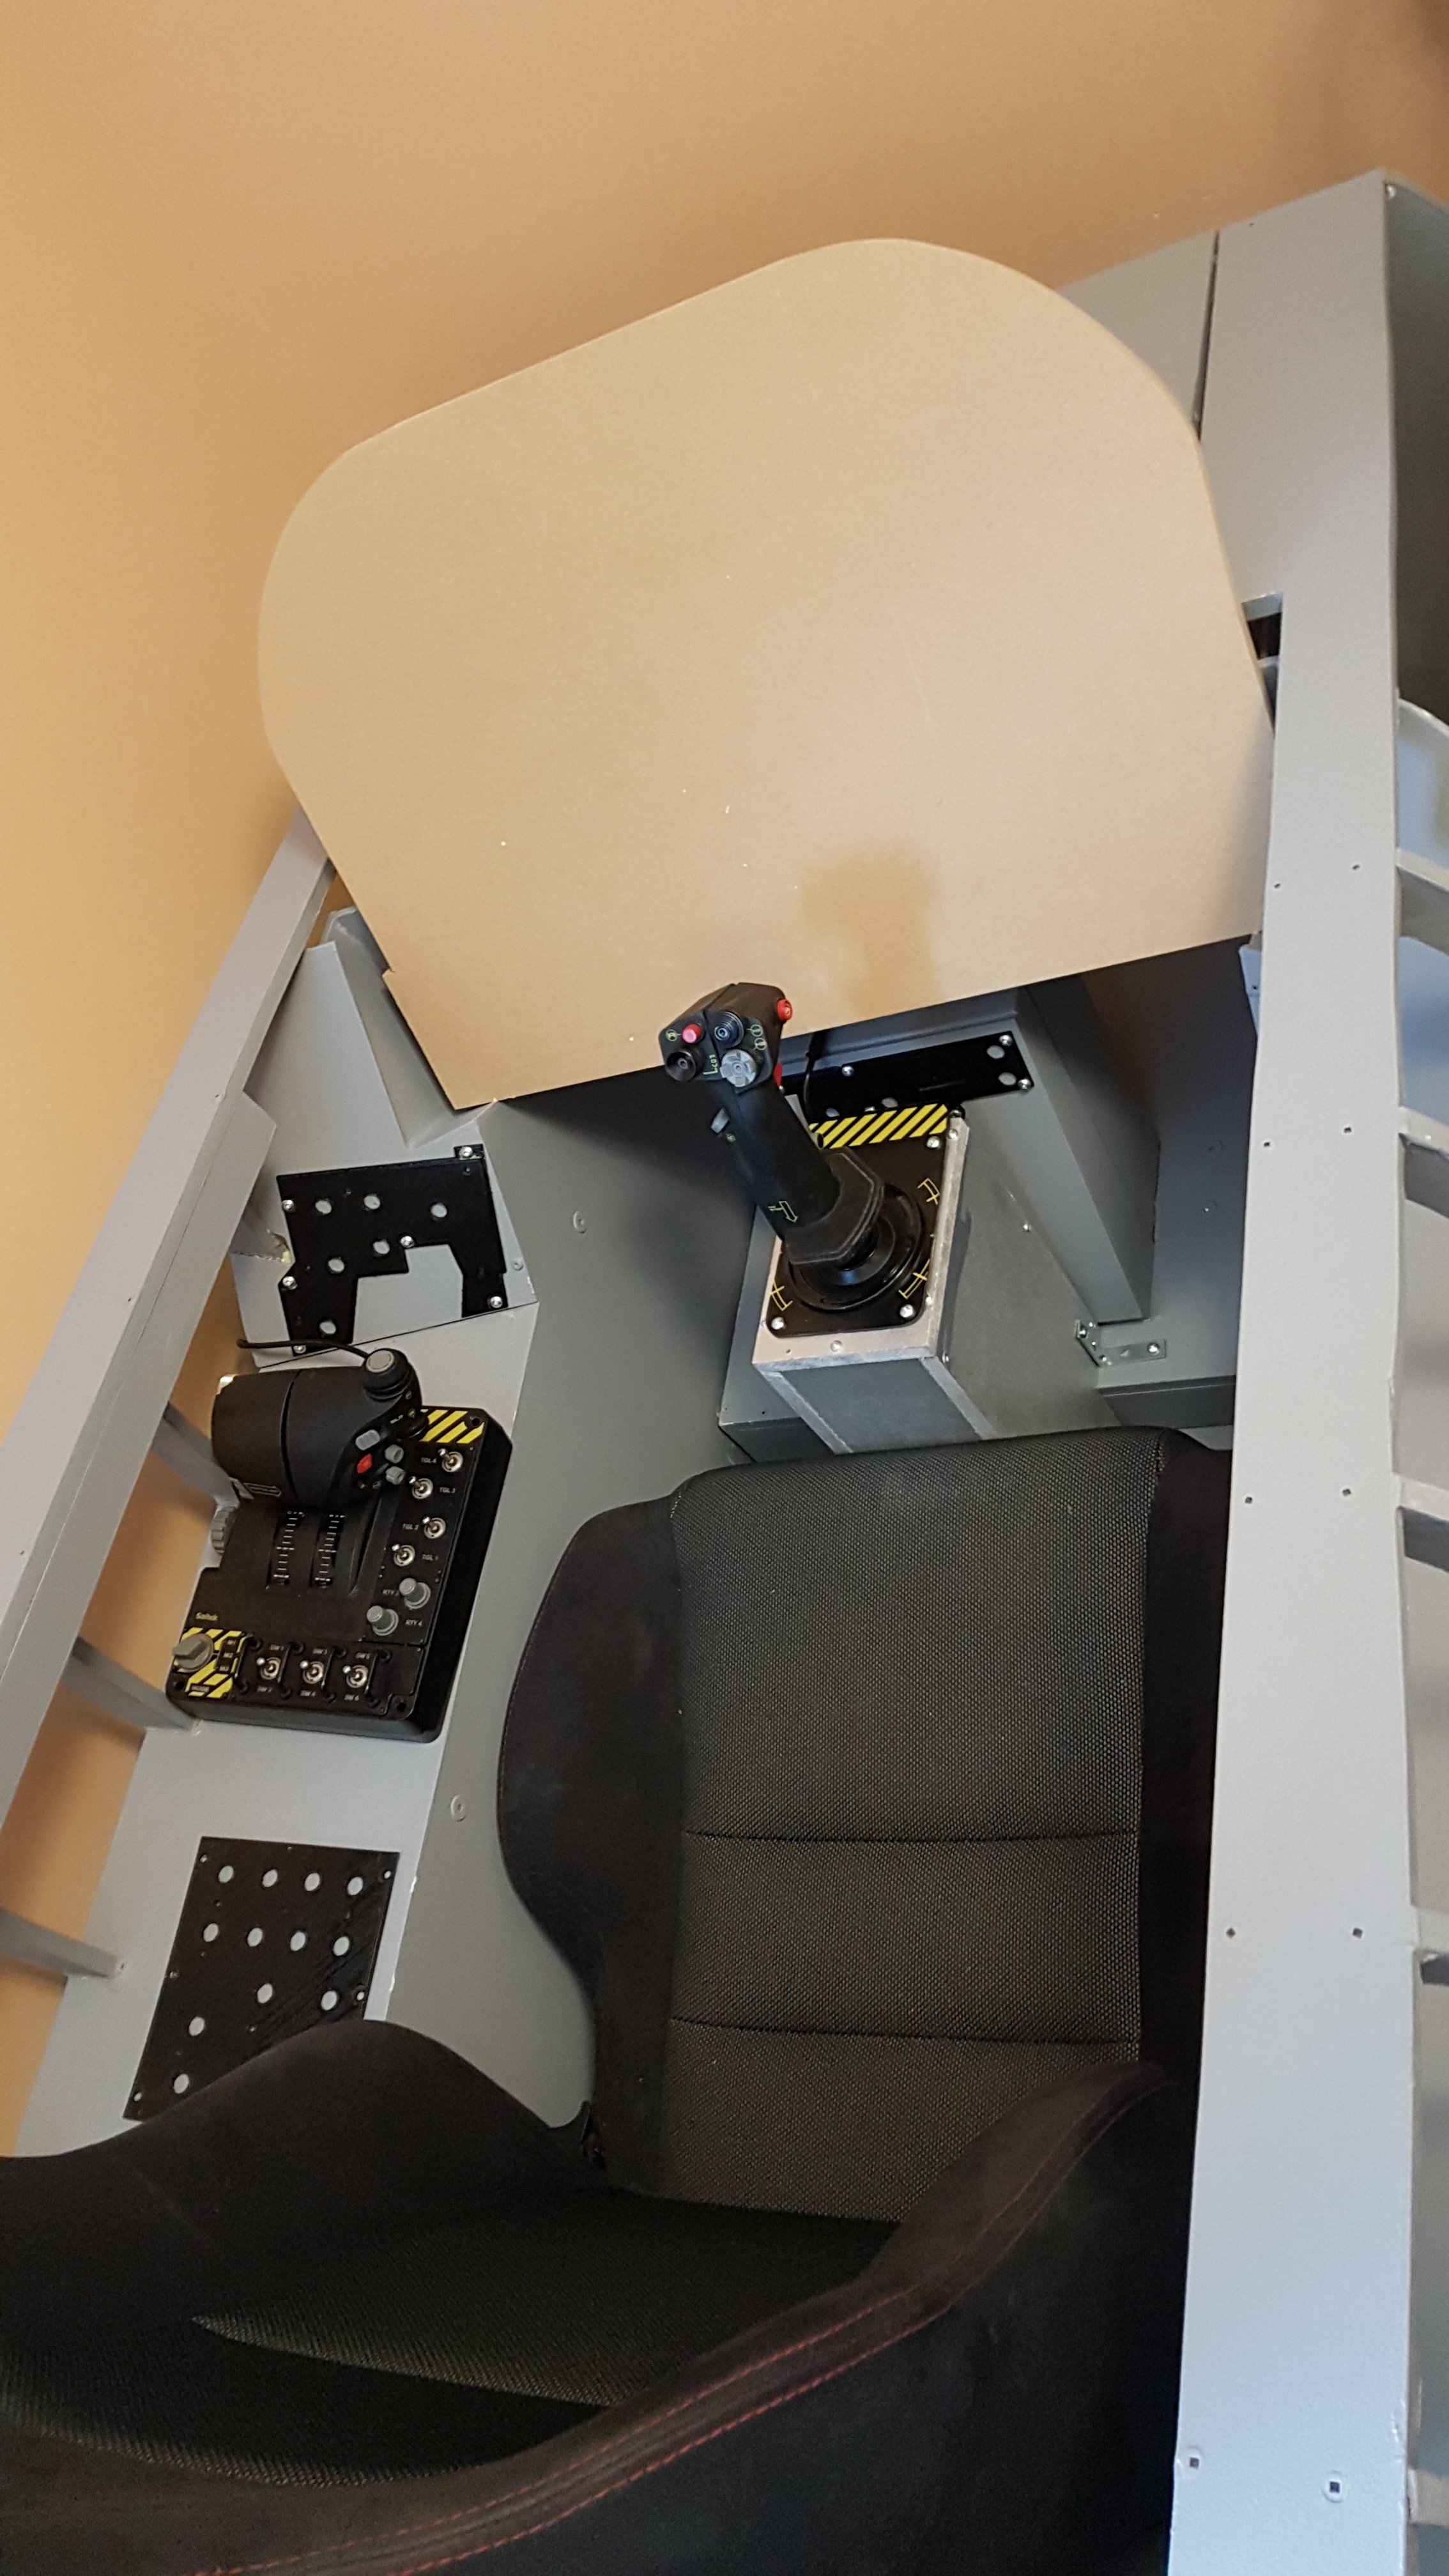
The pedals are awesome. I have been using them under my desk with X-Plane as the wouldn't fit within the cockpit...they fit but were a little too close. Yesterday I took the pit apart to make room for the pedals. Had to remove the bracket I built to stop the Saitek pedals from sliding out the front. Then I placed the new pedals in the right spot, bolted them to the pit base and added an extension to the front for the little bit that hung over the front of the pit. Now they are in the prefect spot. They are way more sensitive than the Saitek ones and feel more natural than the sliding of the older pedals. I used them for a couple of tests within DCS and love them.
-
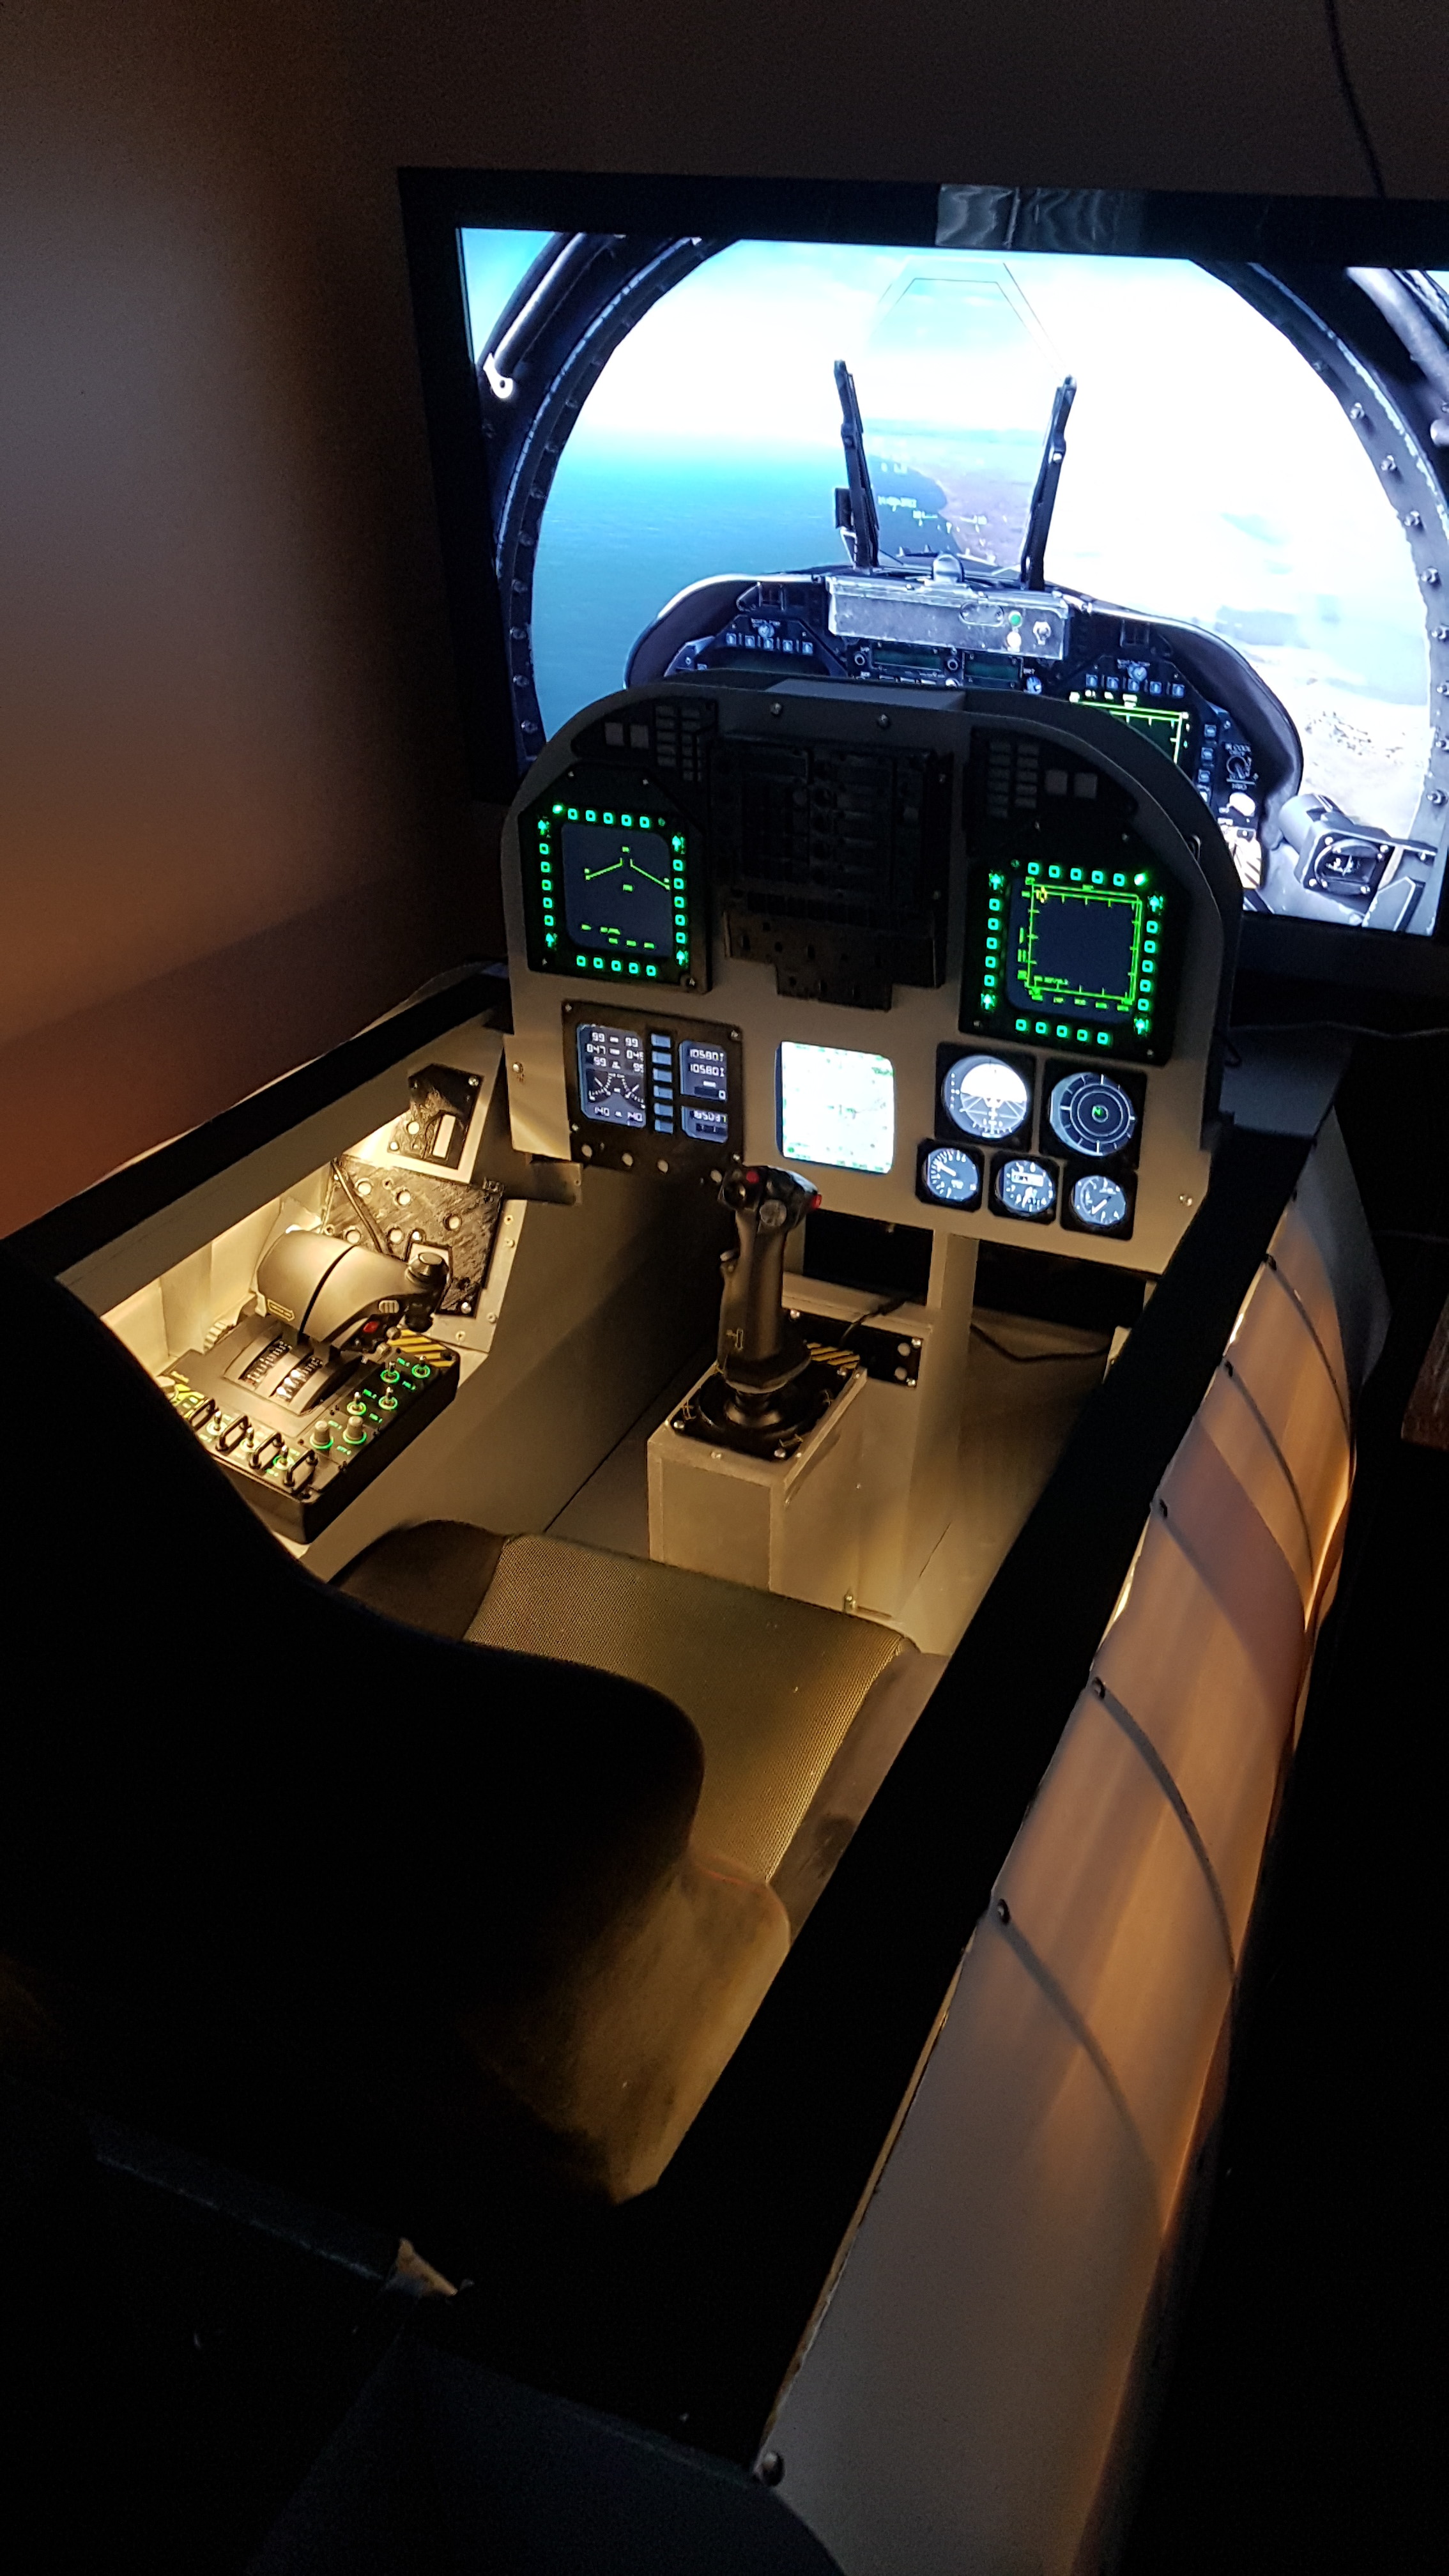
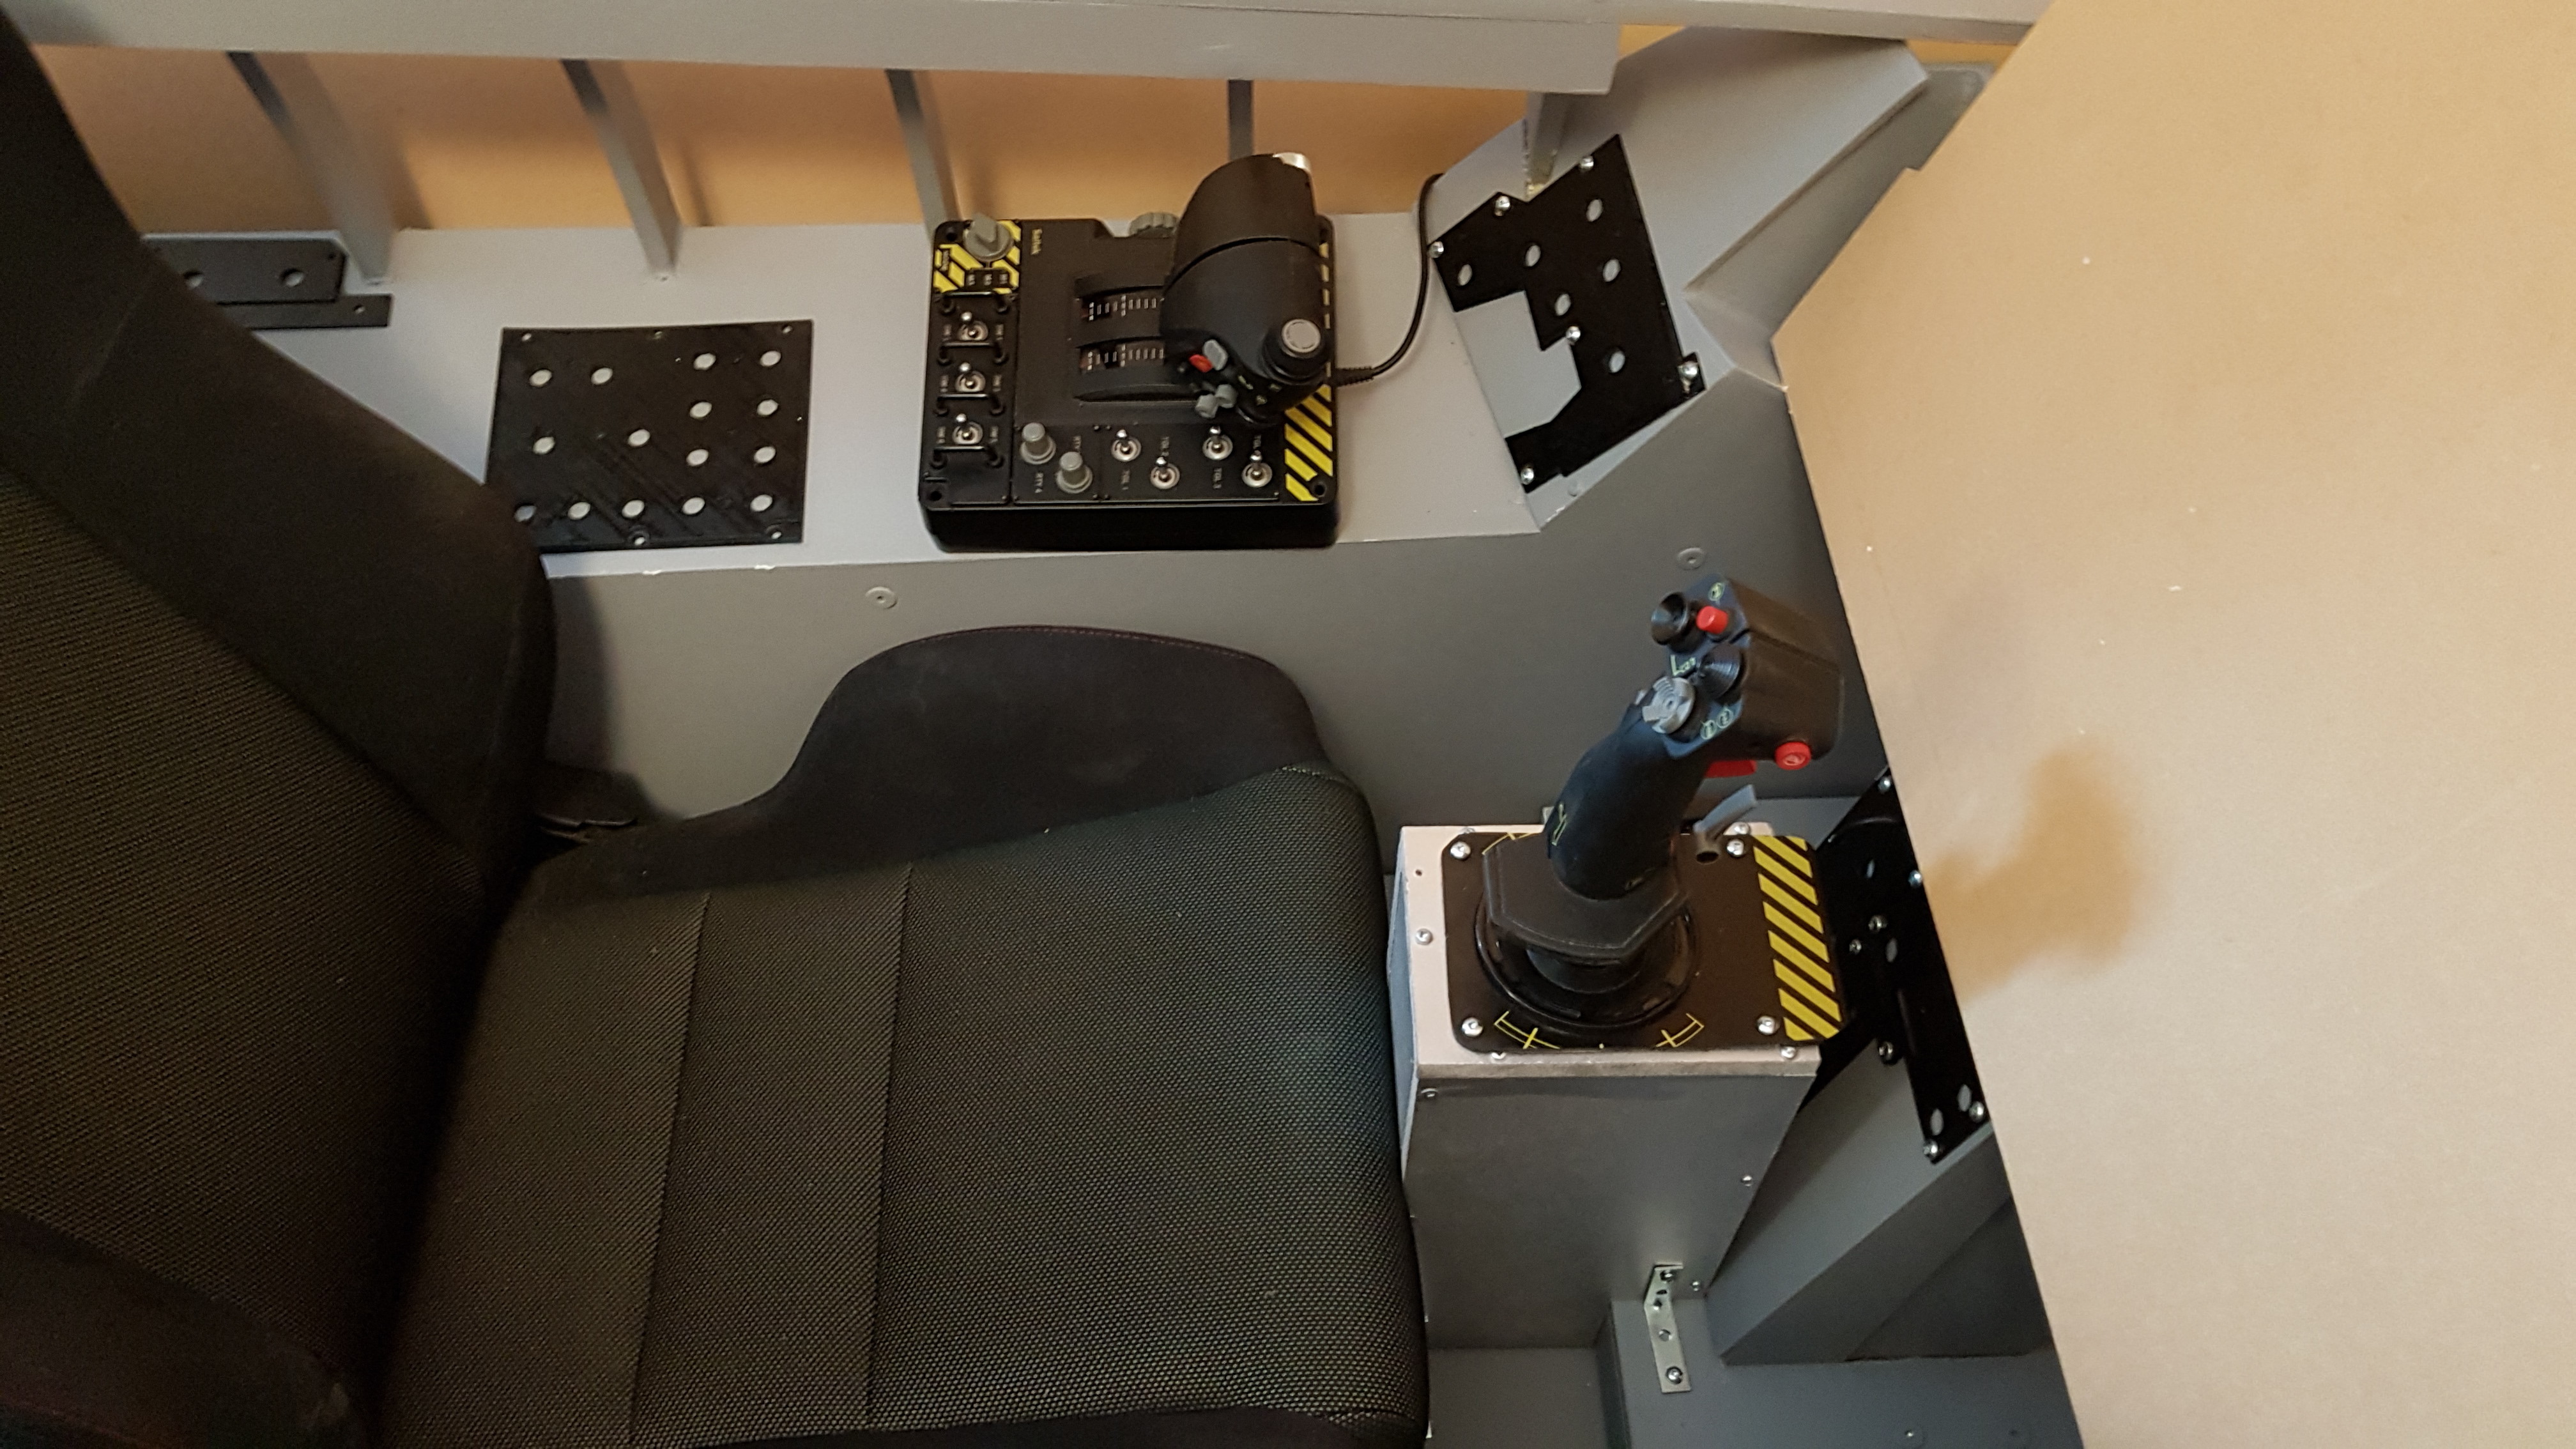
The Warthog (with the F-18 stick...) is next on my list. I was going to get it first, but I saw on Amazon the TPR pedals for a good price and got those first. Worth it as they came without a scratch and looked untouched. The MFD display is a 24" monitor using Helios to display the 3 MFD screens, the fuel information and the secondary gauges. The MFD's are the Cougars with a 3D printed bracket to match with the size/shape of the Hornet. Just need to get one more Cougar for the map.
-
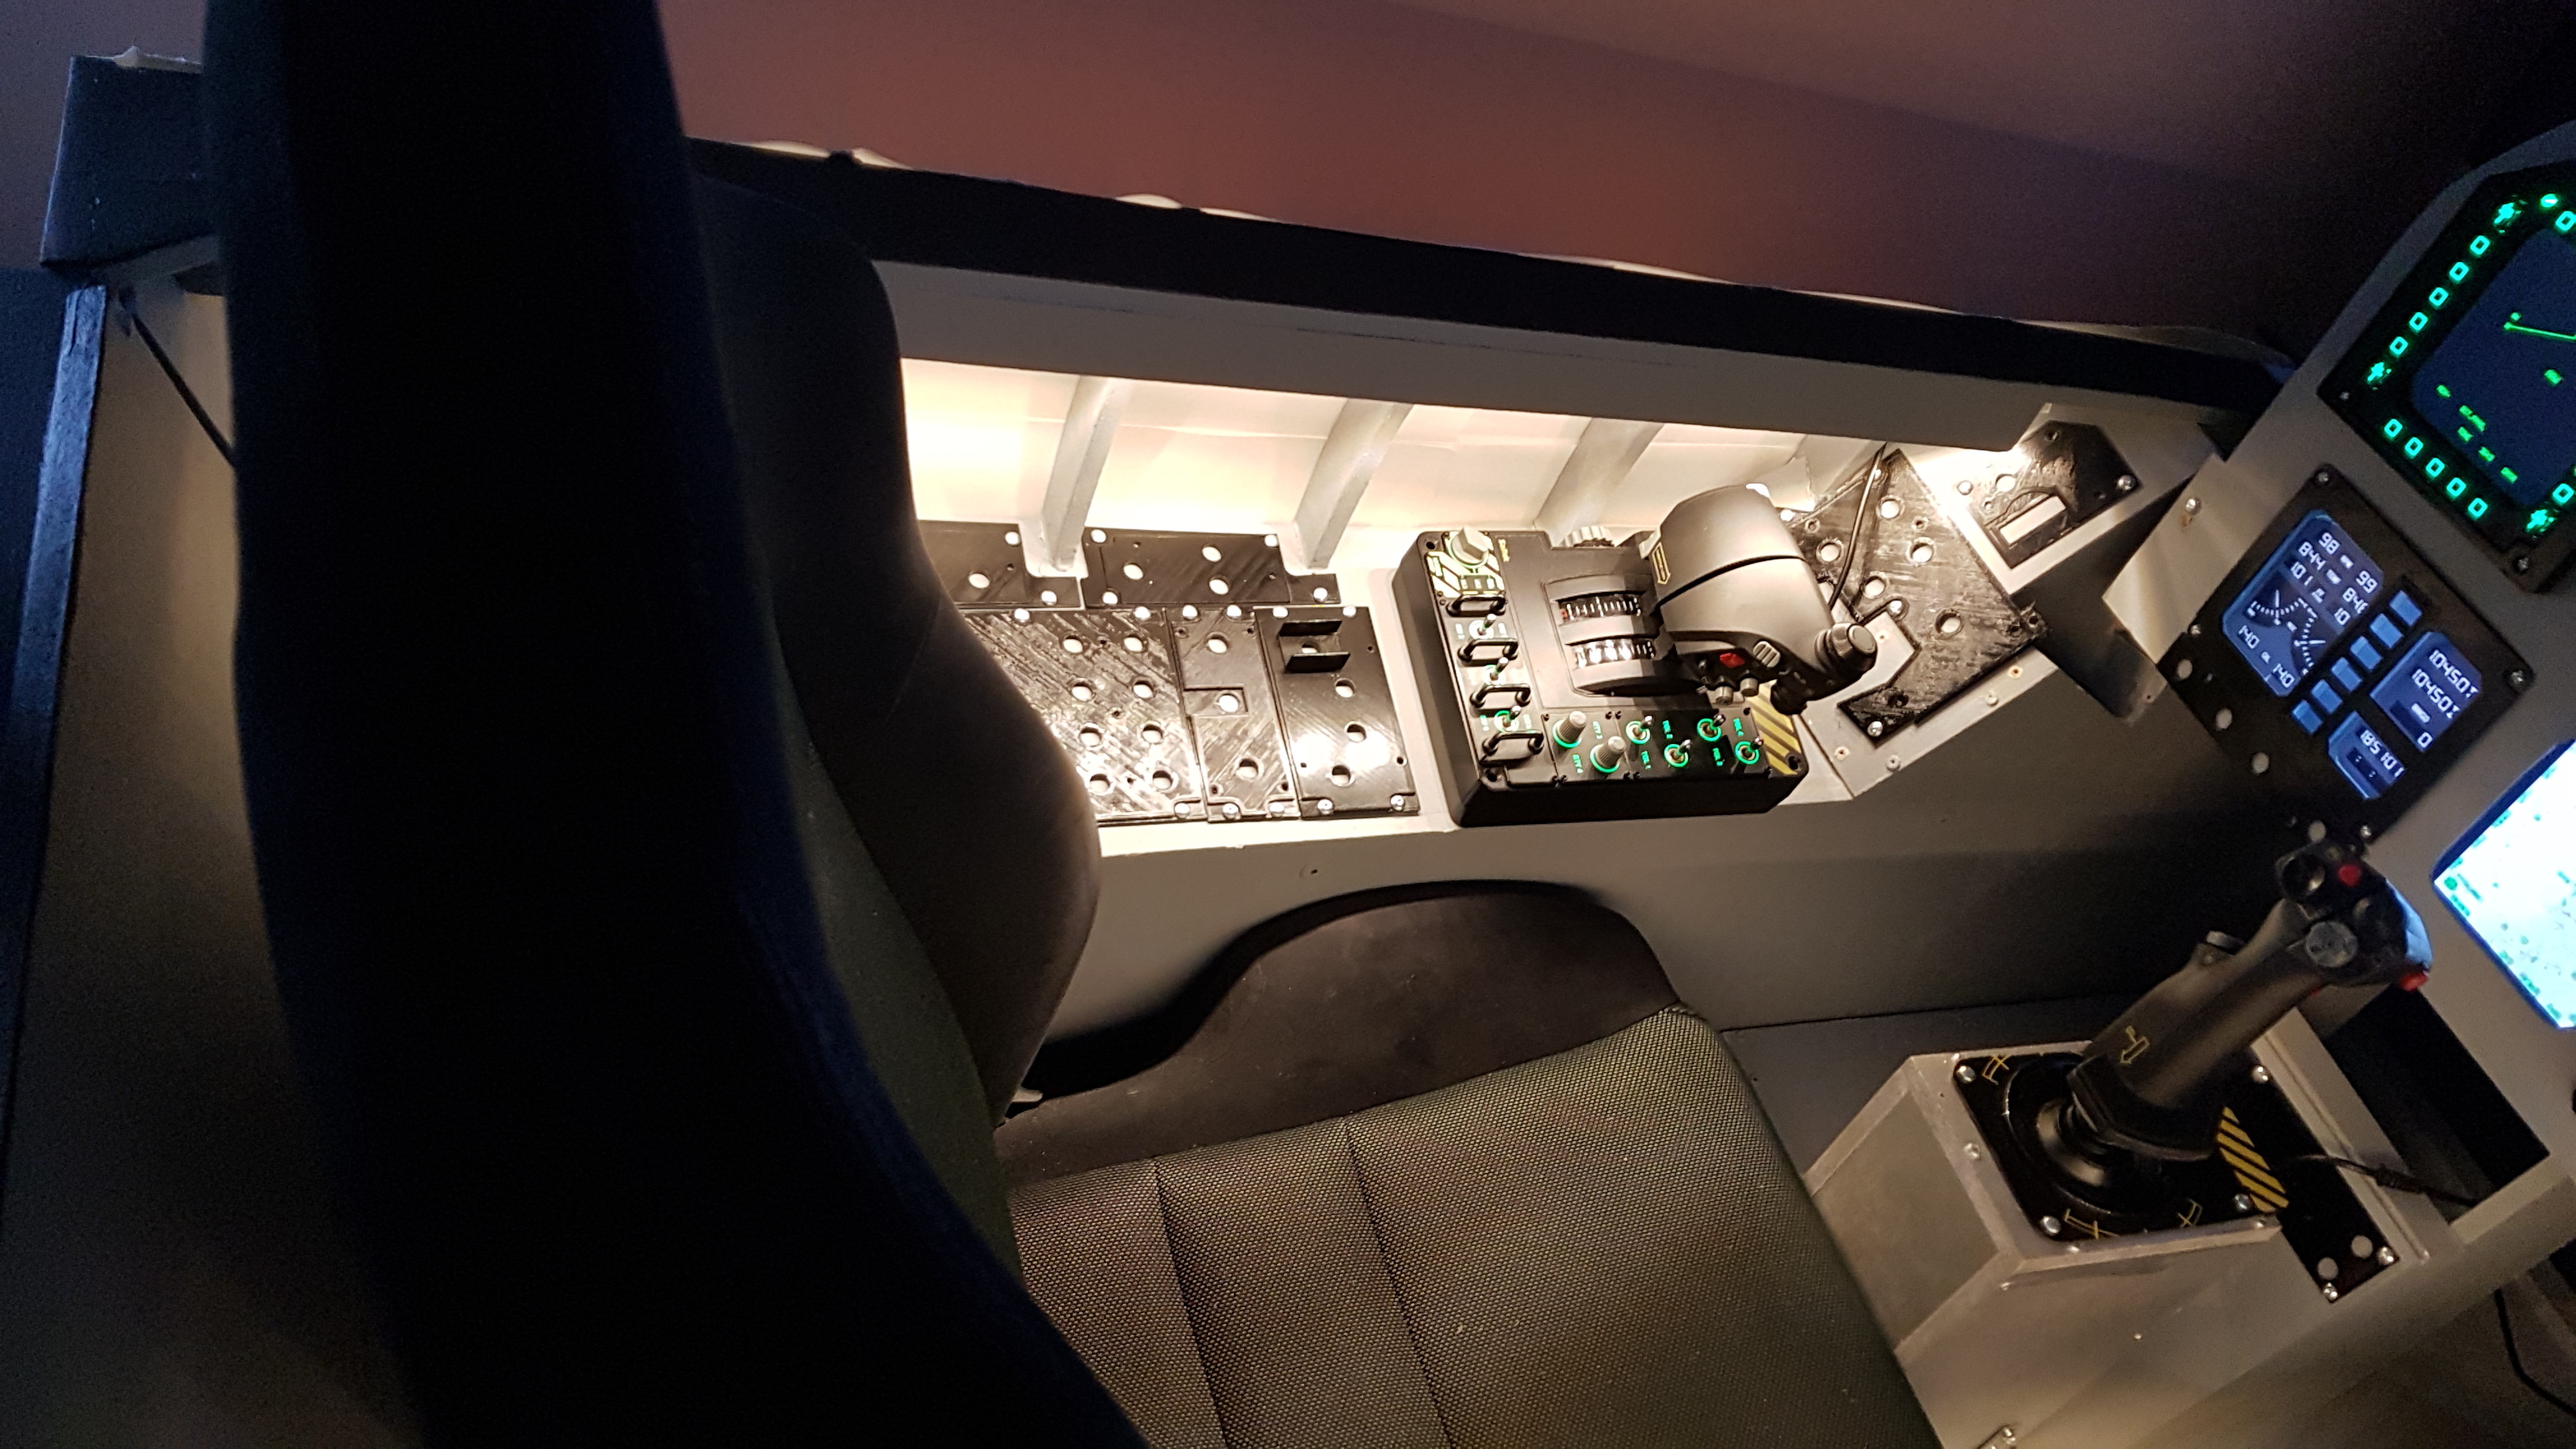
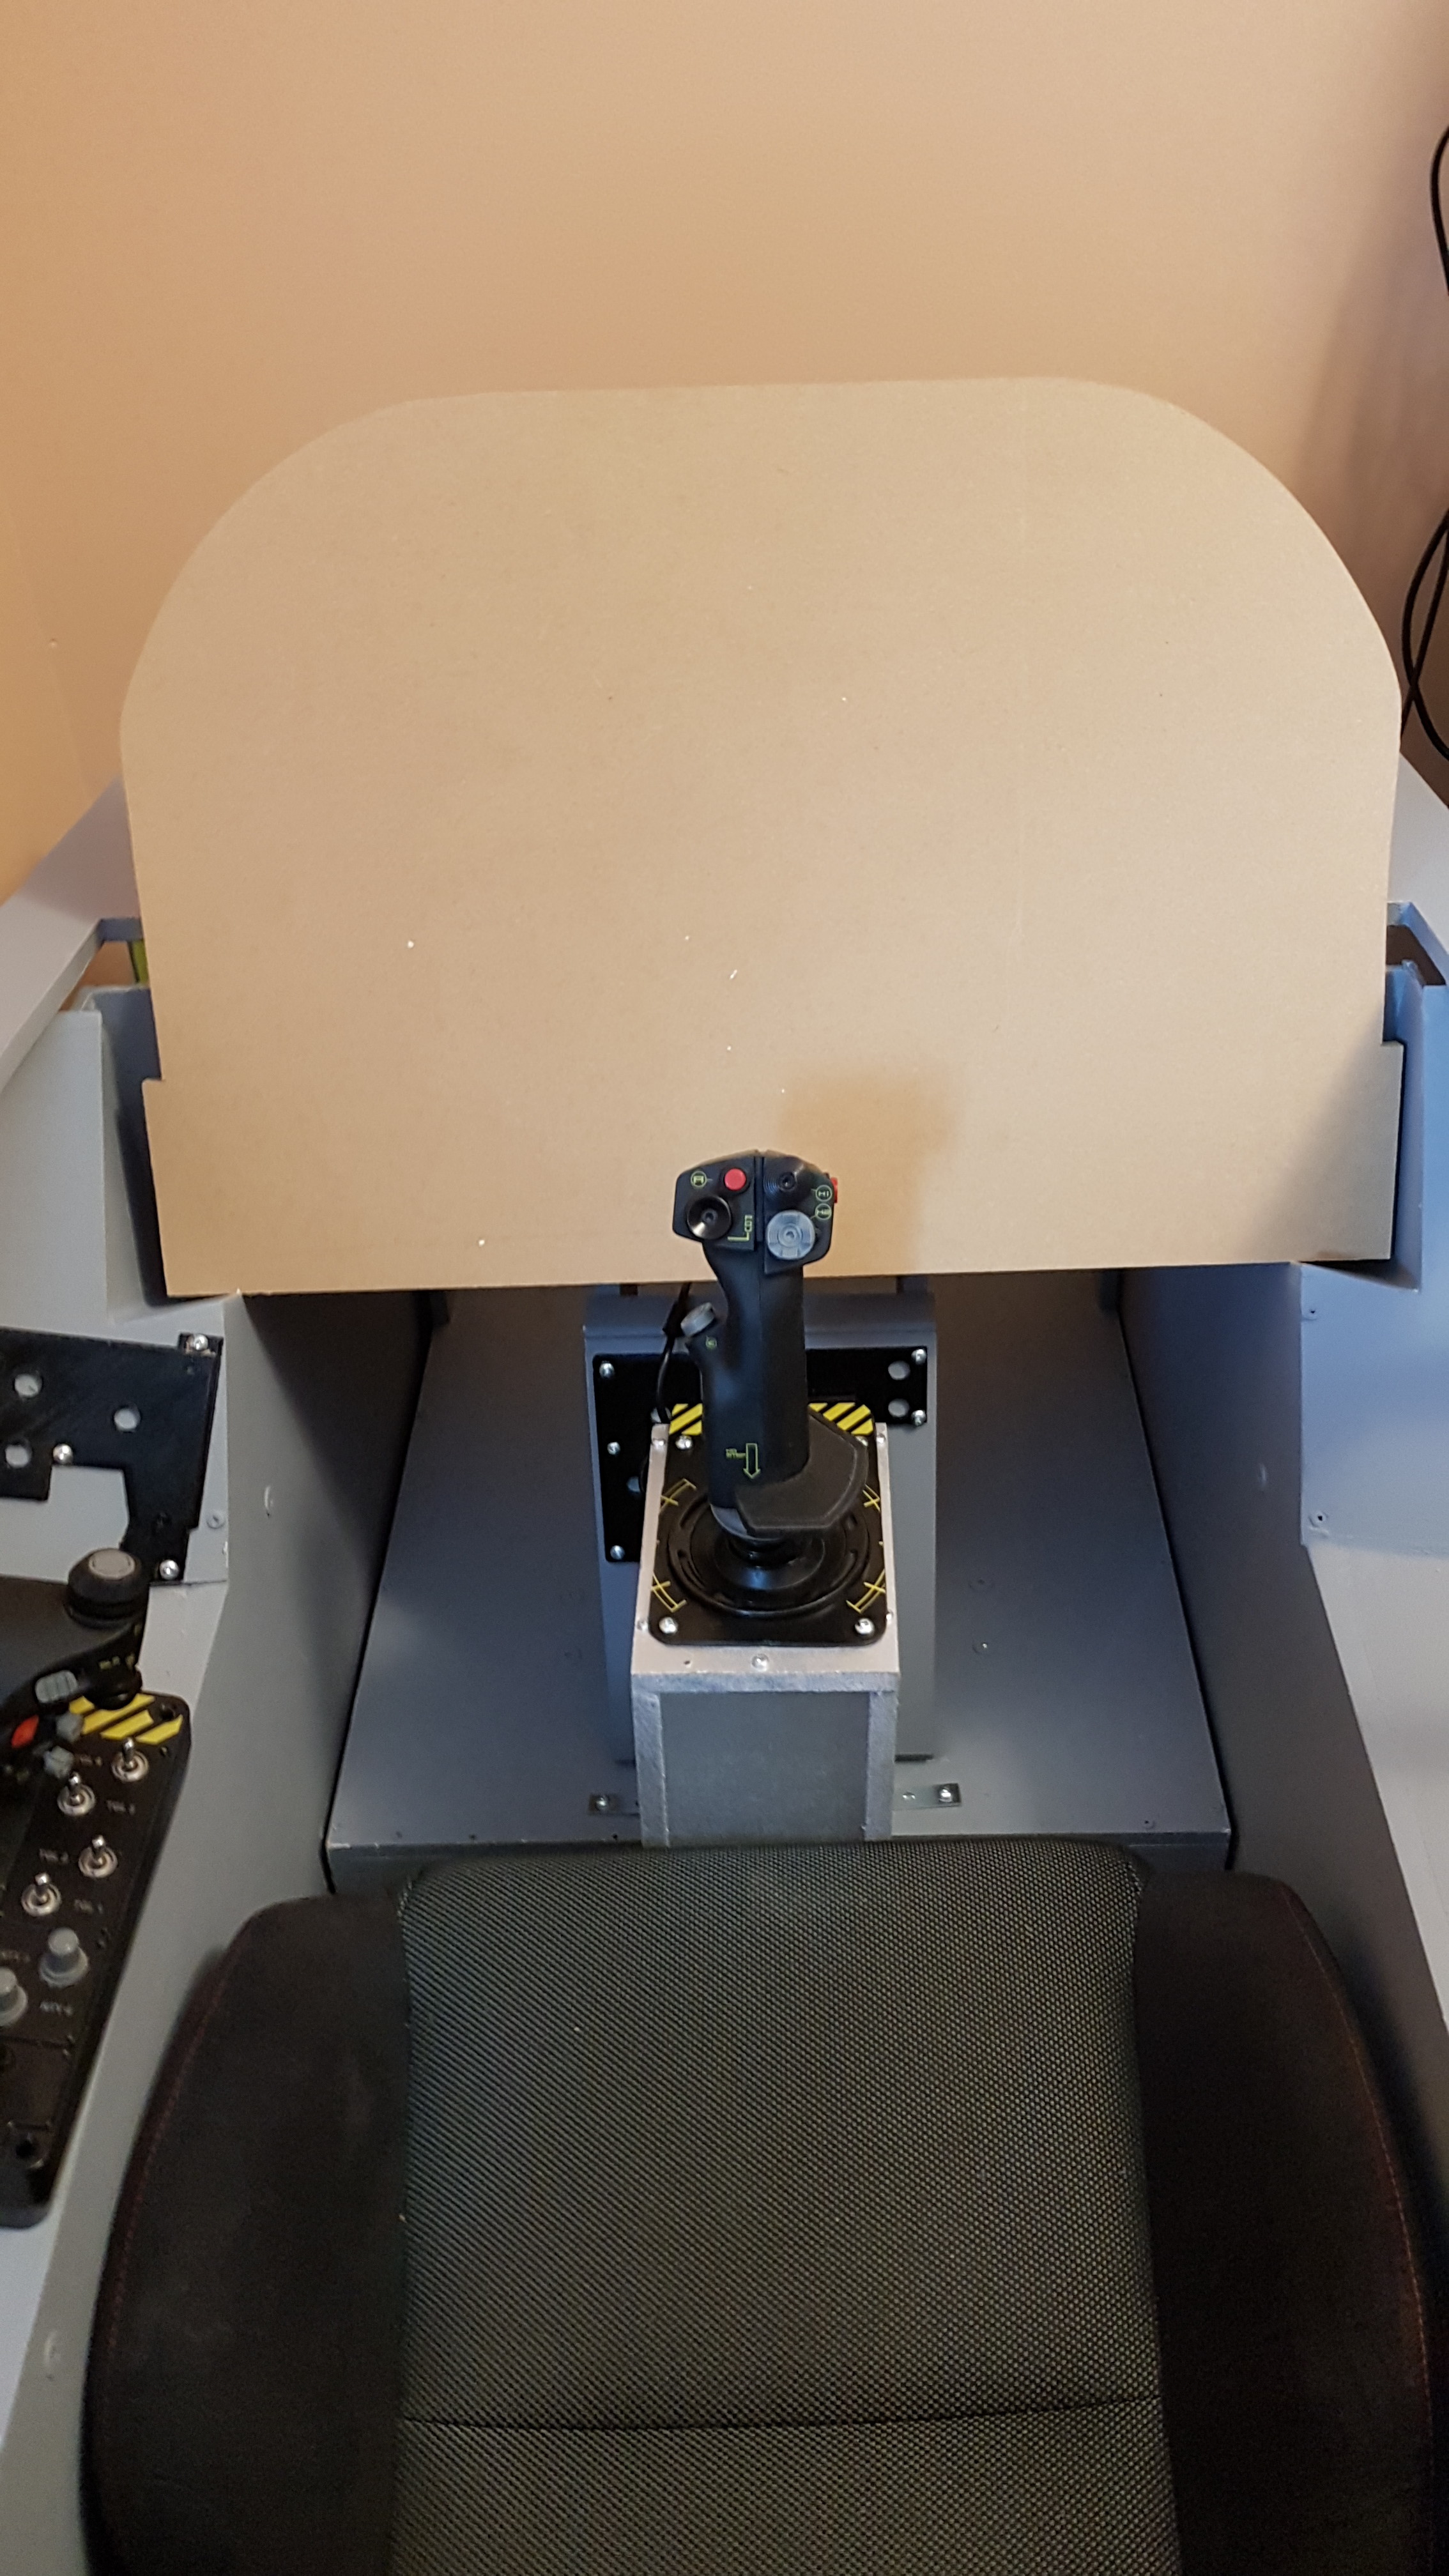
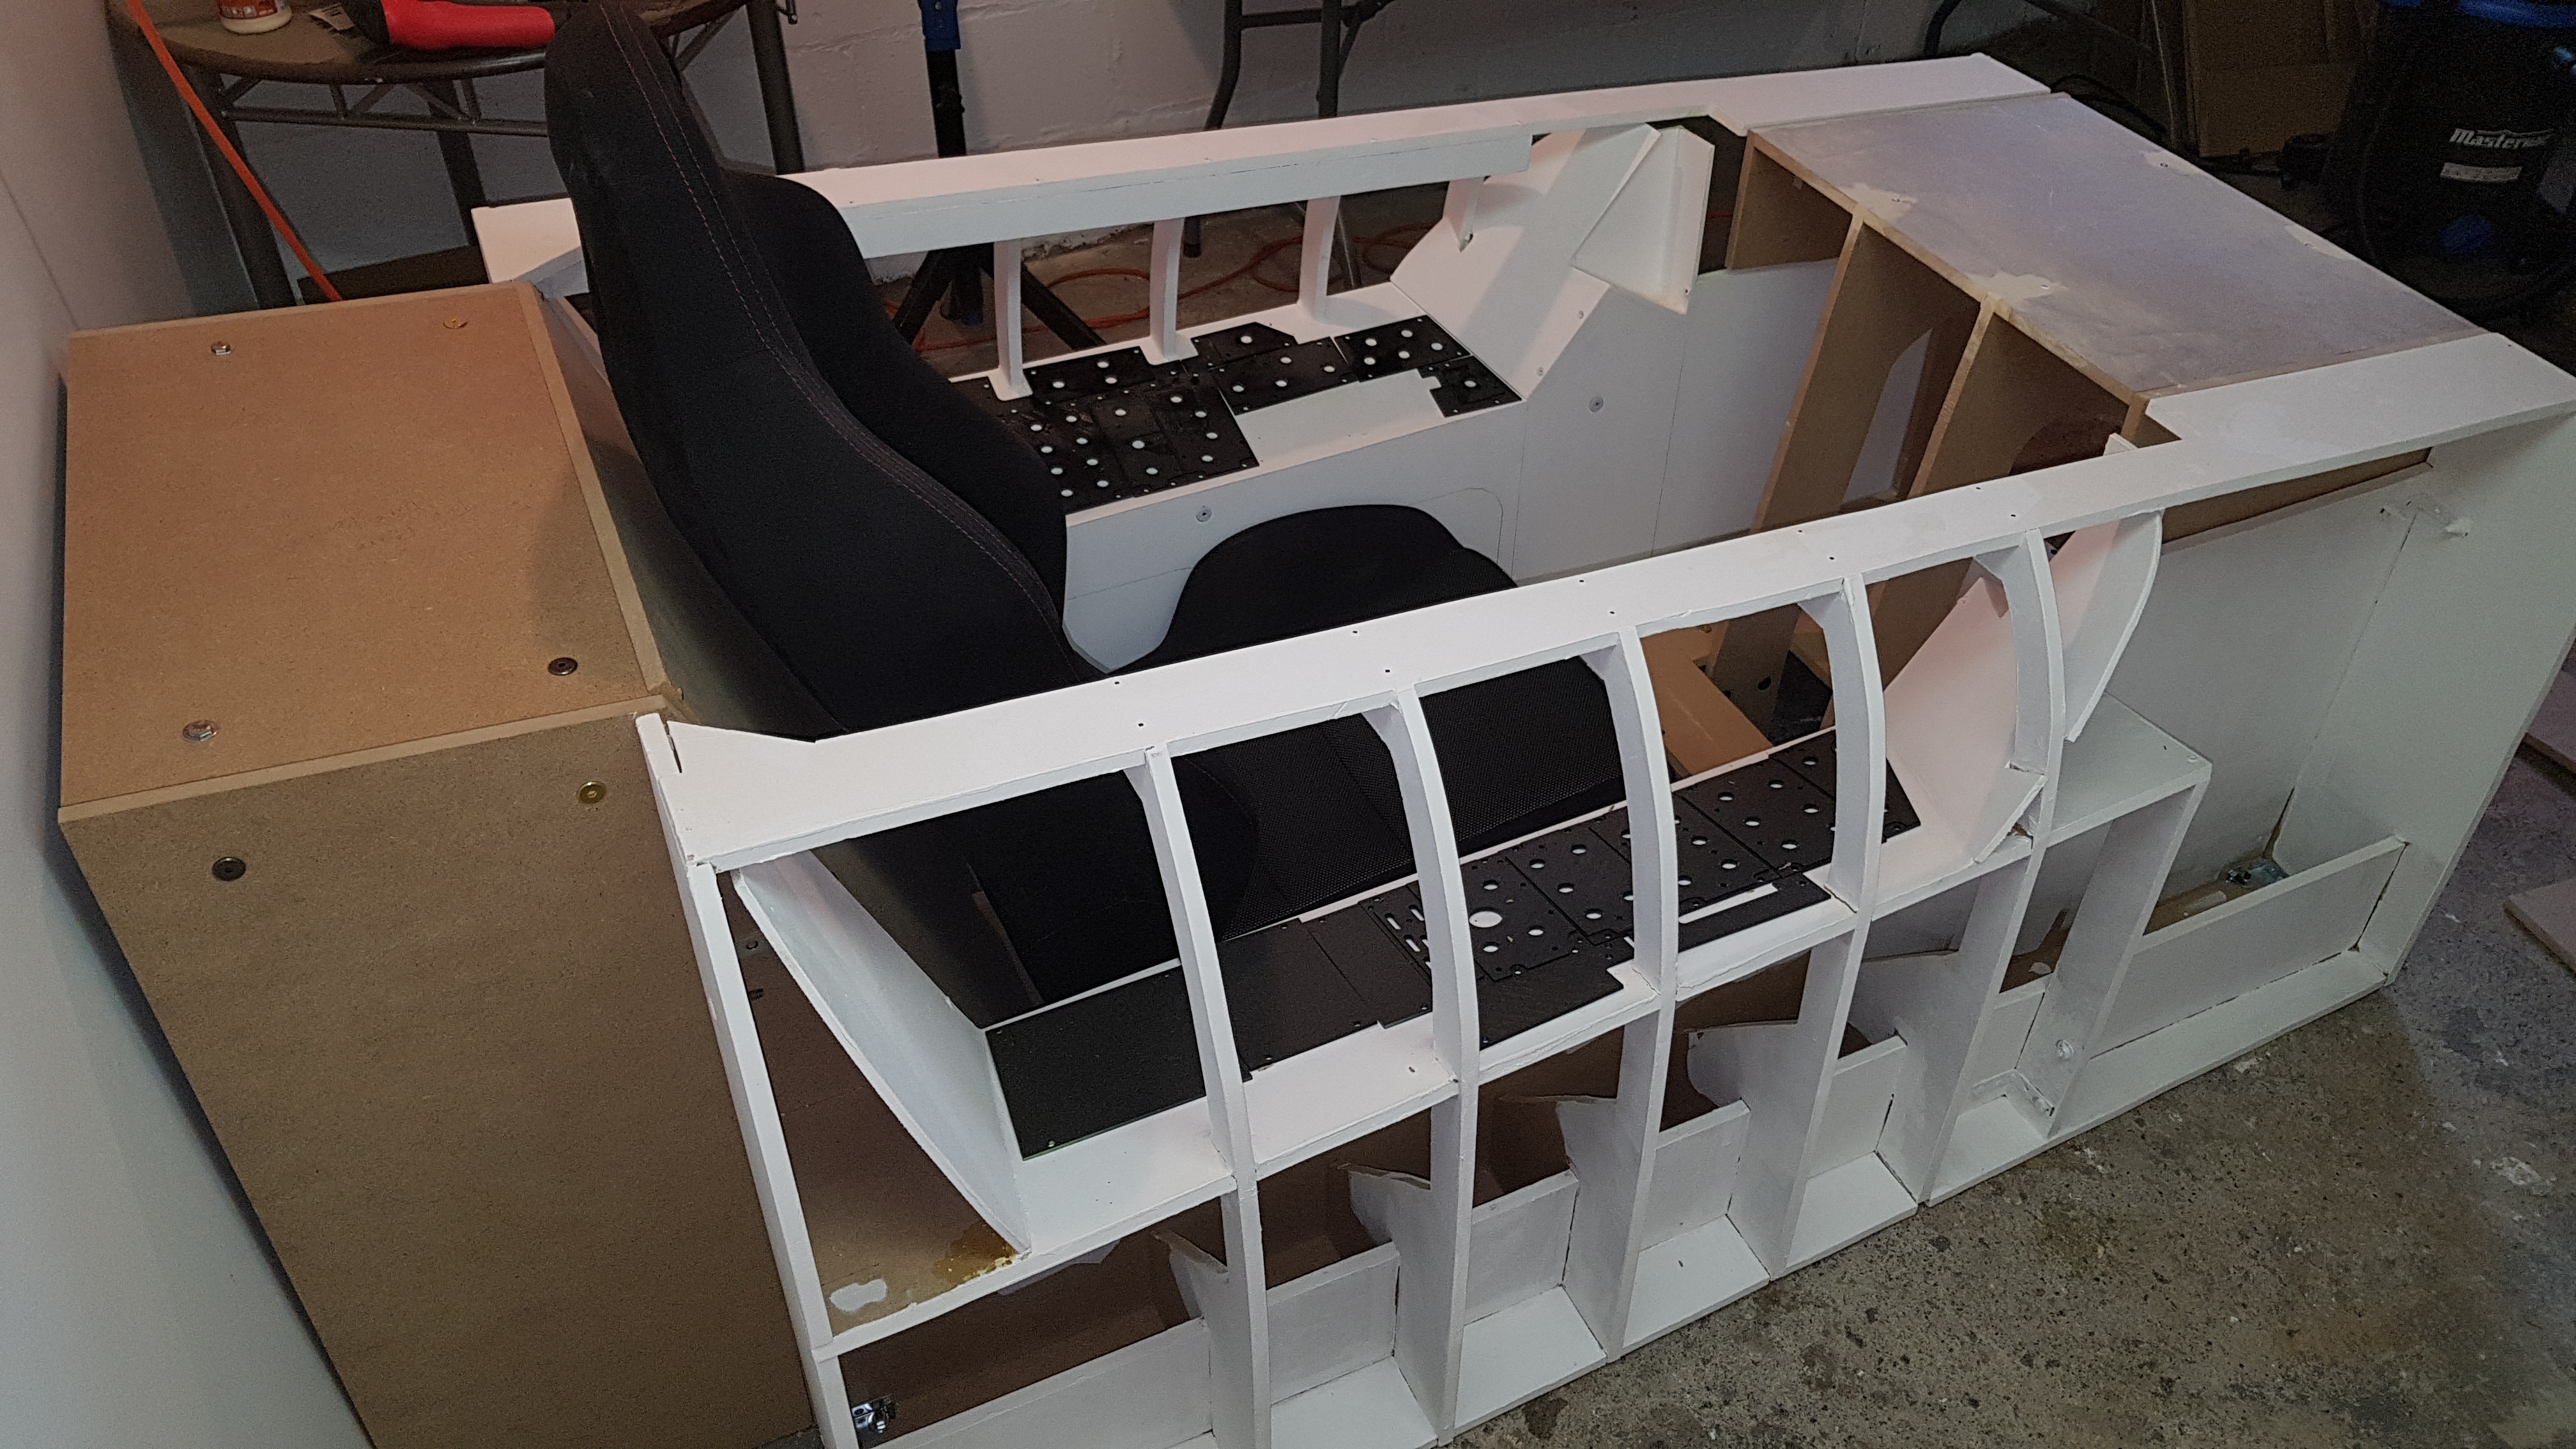
Finally found my connectors for the phone, my youngest keeps stealing them. The first picture shows the cockpit with the poster board sides. This is temp as I wanted to see what it would look like with sides and gives me quick access when I start on the wiring. You can also see Helios is working for the secondary gauges and fuel. This also shows the led lighting I placed under the canopy railings for looks and for the heck of it. The last picture shows the wing extension I built to help get in/out of the cockpit along with the new toy I got just before Christmas. Not too bad for something that was supposed to be damaged.

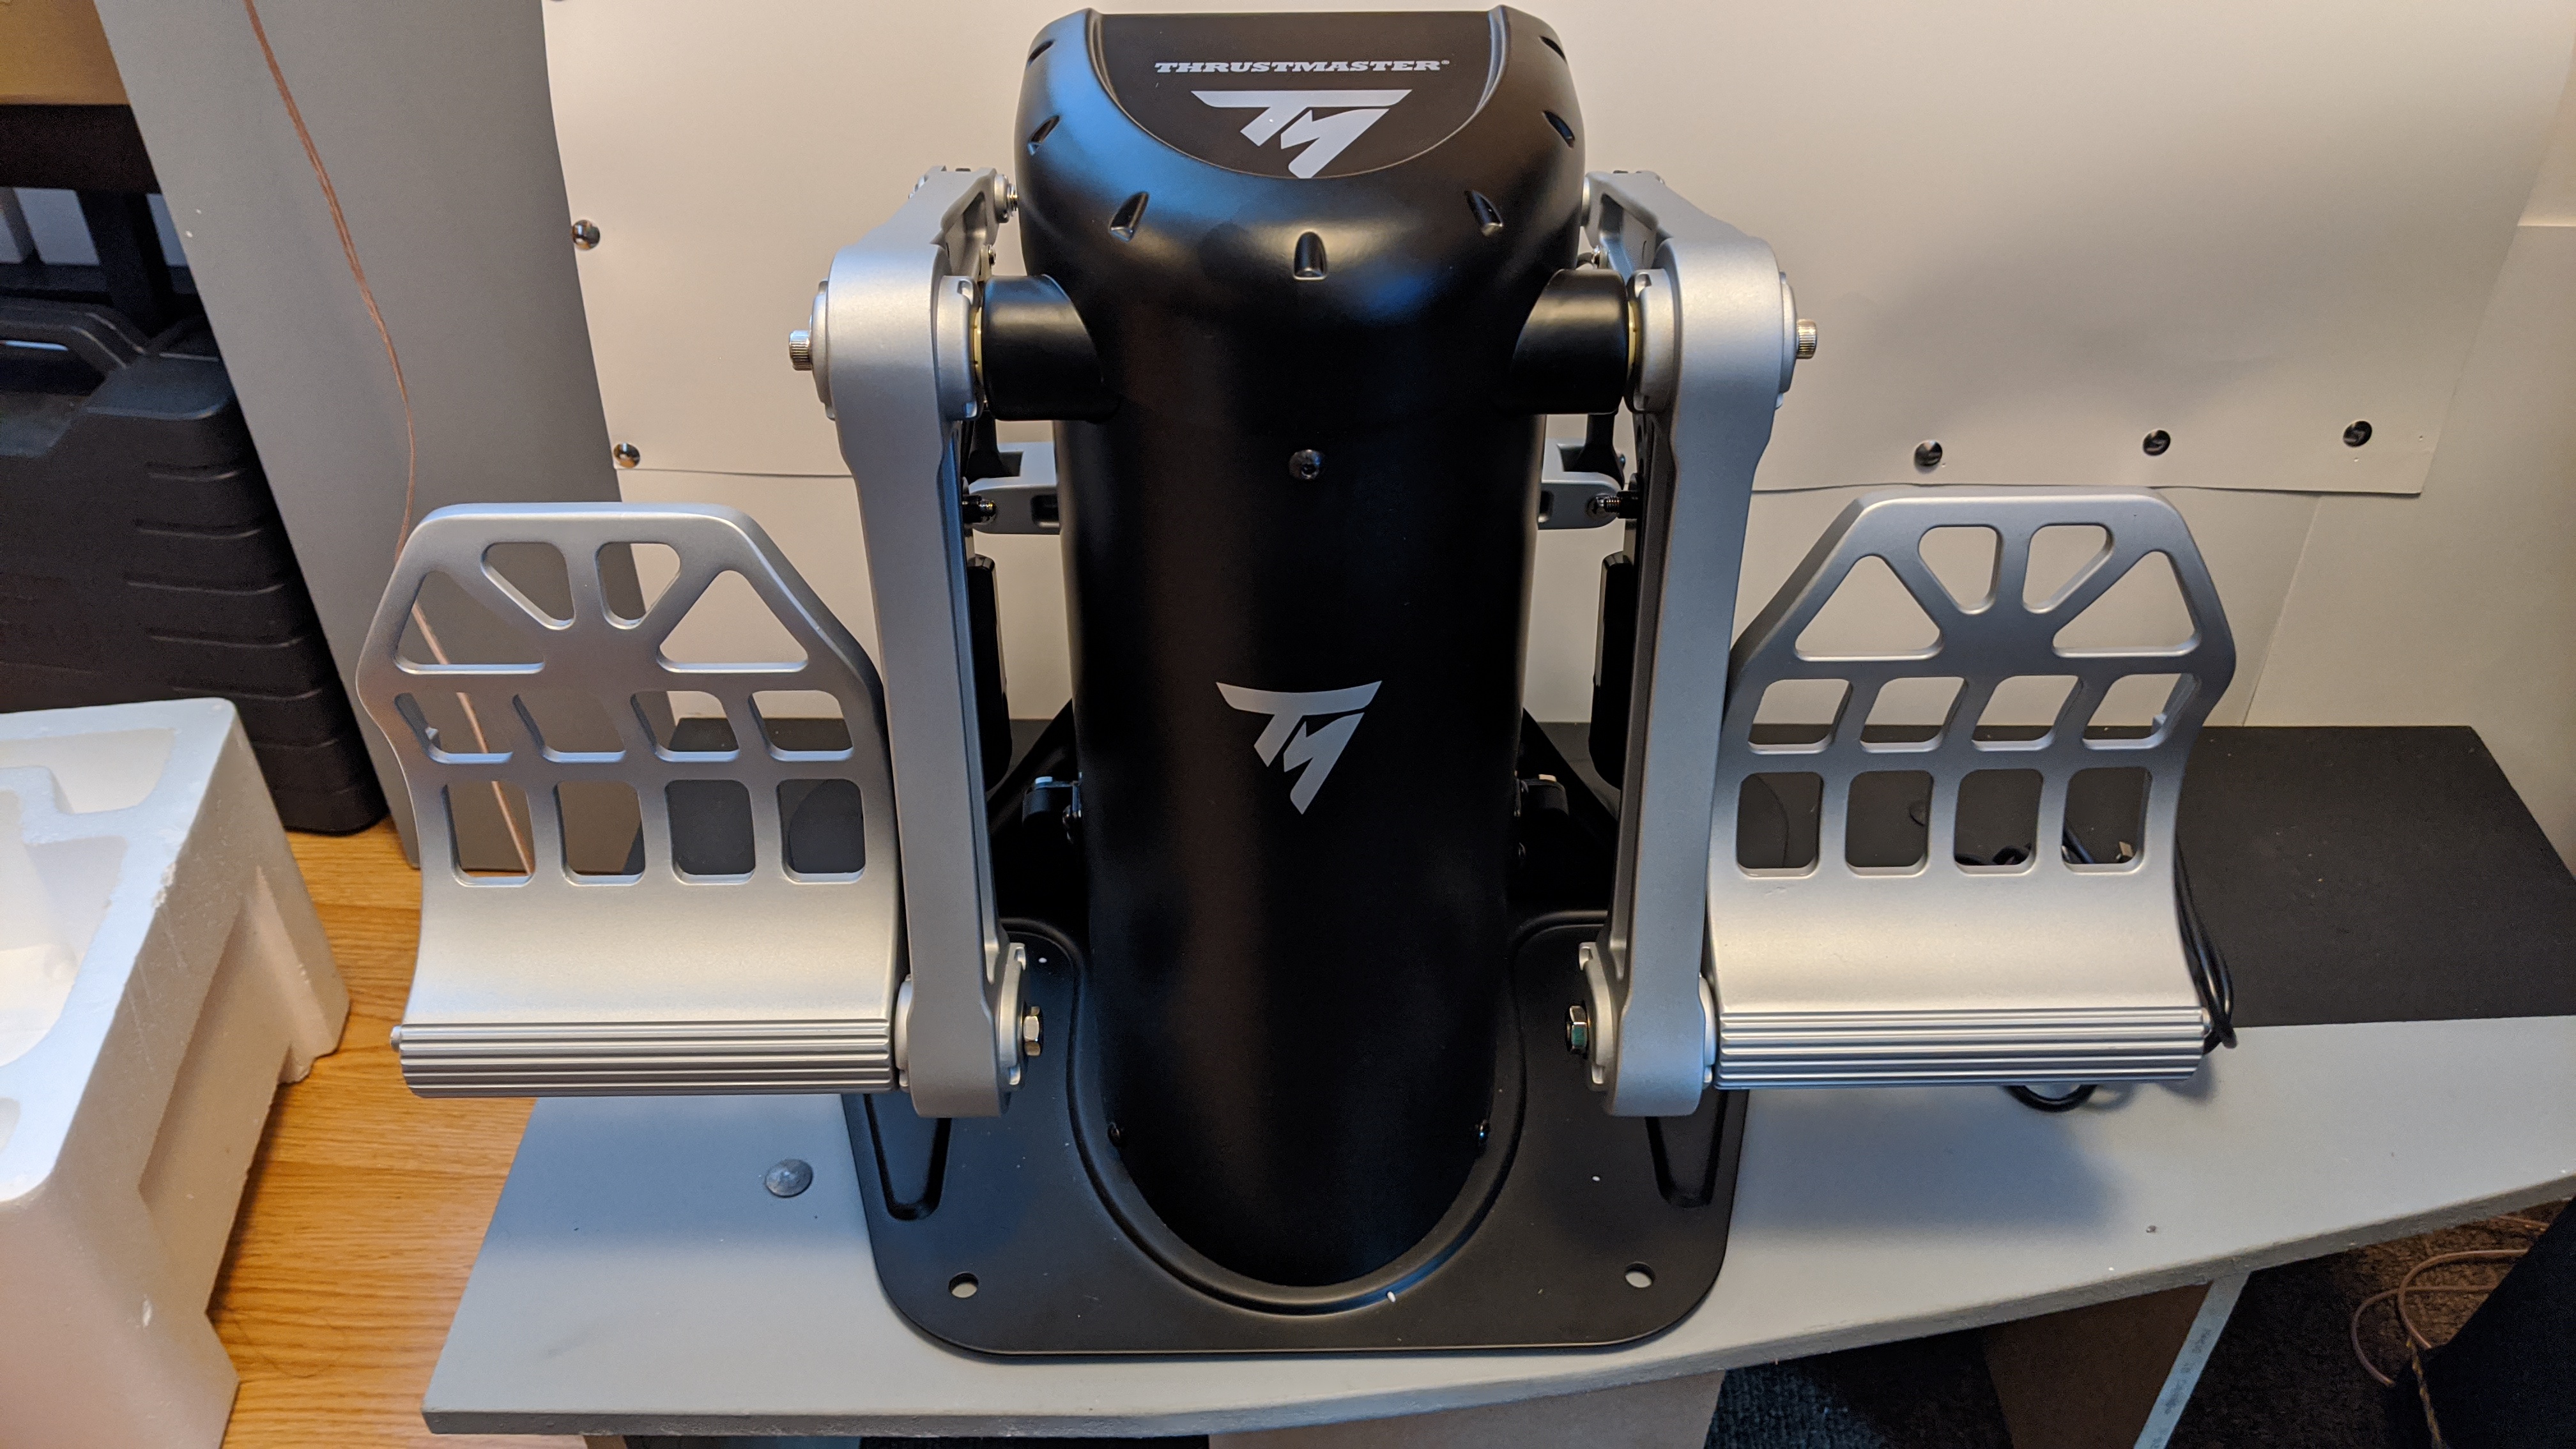
-
A quick update and I hope to add some new pictures soon. Just got a new phone a month ago and haven't transferred the pictures to the PC yet. I did want to share with the group one of my new Christmas presents. Amazon (Canadian...) was listing a Thrustmaster TPR for $342 used. It listed some minor damage on the top, sides and bottom. After thinking about it for a few days I bought it. What a steal...there was no damage at all and looked brand new. Not even a scratch. Saved myself $200-300 depending on which site you read. Now to watch for a deal on the Warthog and F-18 stick. I do need one more MFD Cougar to go around the map display but so far I have to buy it as a pair. I'll keep looking. My wife and I had her family here on the 24th and my brother in-laws loved it. Had a hard time getting them off of it. My one brother in-law posted pictures on Facebook and Instagram about it.
-
Try this link... https://www.logitech.com/assets/65324/x56-hotas.pdf
-
Exciting week...I got the pit up into the "office" area and have started working on it a little more. I modified the X-55 stick to be smaller to fit between my legs but the 3D printed base broke when connecting it to the wood base. So I cut a whole in the base and attached the stick to that. Seems to work...haven't tested in sim yet to ensure I didn't break anything during the hacking process. The throttle is a little big so I may us one of the Saitek throttle quads I have seeing I do want to use the pit for WW-1 and WW-2 birds as well. Next will be cutting a hole in the front panel to stick one of my 24" monitors behind it. I know it isn't going to be exactly like a Hornet, but it should do with what I have on hand. I hope you guys like it.
-
:megalol: I liked that...that was way too funny and so close to the truth. I was thinking of that or as my daughter told me, make a step ladder as my old body was having a hard time getting in to show the wife and kids. Damn kids...that's why I'm so old. I also had an idea to make the leading wing edge as a step to get in and out as that should look cool and most likely easier than a hinge set-up.
-
Hi everyone. I figured I should maybe show off some of my work so far on my pit as this site has helped me out a lot, along with HornitPits.org. My tool closest is very limited and so is my shop area...a small corner in the basement. The first 2 section (both side sections...) where done with just a jigsaw, handsaw and a drill. The plans I got from HornitPits which turned out very simple to follow and use, once I learned how to explode the parts within SketchUp. Most, okay all, of the cuts aren't the straightest but I think it still looks pretty decent and usable. I definitely haven't done any wood work since high school back in the early 80's and it kinda shows. My original plan, which changed about a million times, was to use either 3 monitors (which I already have...) or go with a projector system. But then Microsoft Store had the Odyssey Plus on sale, so I picked it up. At the time my system was really old with an i5 and a 1050 ti. Not the greatest but boy was I hooked. Upgraded this month to an i9 with a 2080 Extreme...talk about night and day difference. So VR seems to be the route. Even with VR I still want to work on the switches and such as the rest of you got me hooked on the actual coding side of things. Really looking forward to that part as it should be a lot of fun. Well I hope you like what I have started so far and I really want to thank all those on these sites that shared their work allowing me the chance to build mine. Oops, I forgot to mention the car seat as it was an awesome find. Local wreckers for $40. My eldest daughter found it on our trip to the wreckers to find a seat for the pit.
-
Thanks for the information. The Hornet is the only one I really wanted to try anyway.
-
I just put a new computer together for a friend of one of my kids. He told me I could play around with it for a couple of months which is perfect as it is an AMD 1950x chip and would like to see the performance of DCS on it with his 1080. My set-up is an older i5 with a 1050Ti. Frame rates are not bad but really want to see what his can do, especially with the Hornet. Is there an issue with install DCS modules I purchased on his machine to test out? Do I have a limited number of installs to worry about. I would never leave any of the modules on the system when I give it back to him, in fact I'll be re-formatting the drive and install Windows under his name. Currently it is under mine for now.
-
I am in for the Bf.109K-4 please.