Zeus67
-
Posts
3150 -
Joined
-
Last visited
-
Days Won
6
5 Followers


-

Barometric value 29.89 inHg at altimeter missing
Zeus67 replied to Draken401's topic in Bugs and Problems
Please submit a track file. We cannot reproduce this issue. We can calibrate to 29.89
-
CTD when swapping from bomb view back to cockpit
Zeus67 replied to AhSoul's topic in Bugs and Problems
Hi. We need the crash log. -
If you start with the aircraft hot on the ramp or on the runway, it will be trimmed for take-off. That's SOP. You will have to trim it down once you are in the air. If you read the manual, you will see that there is a take-off trim button that needs to be pressed. If you use autostart, I will be automatically pressed.
-
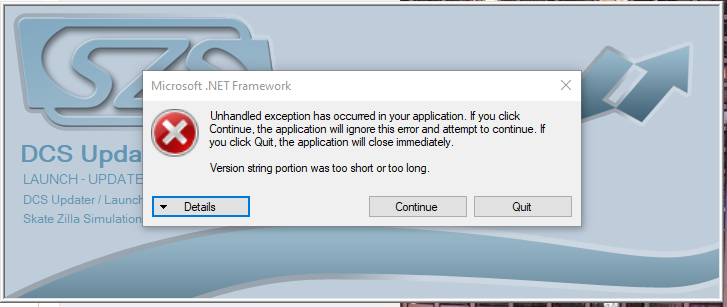
Hi! I get this error after the latest Windows Update:
-
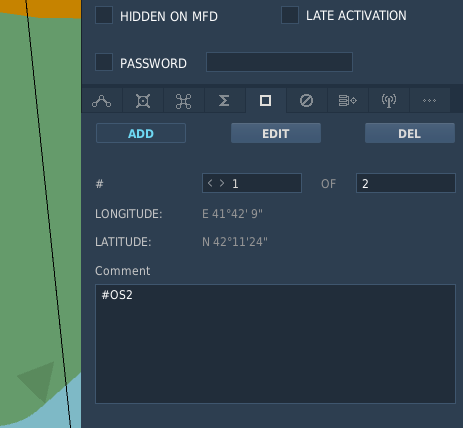
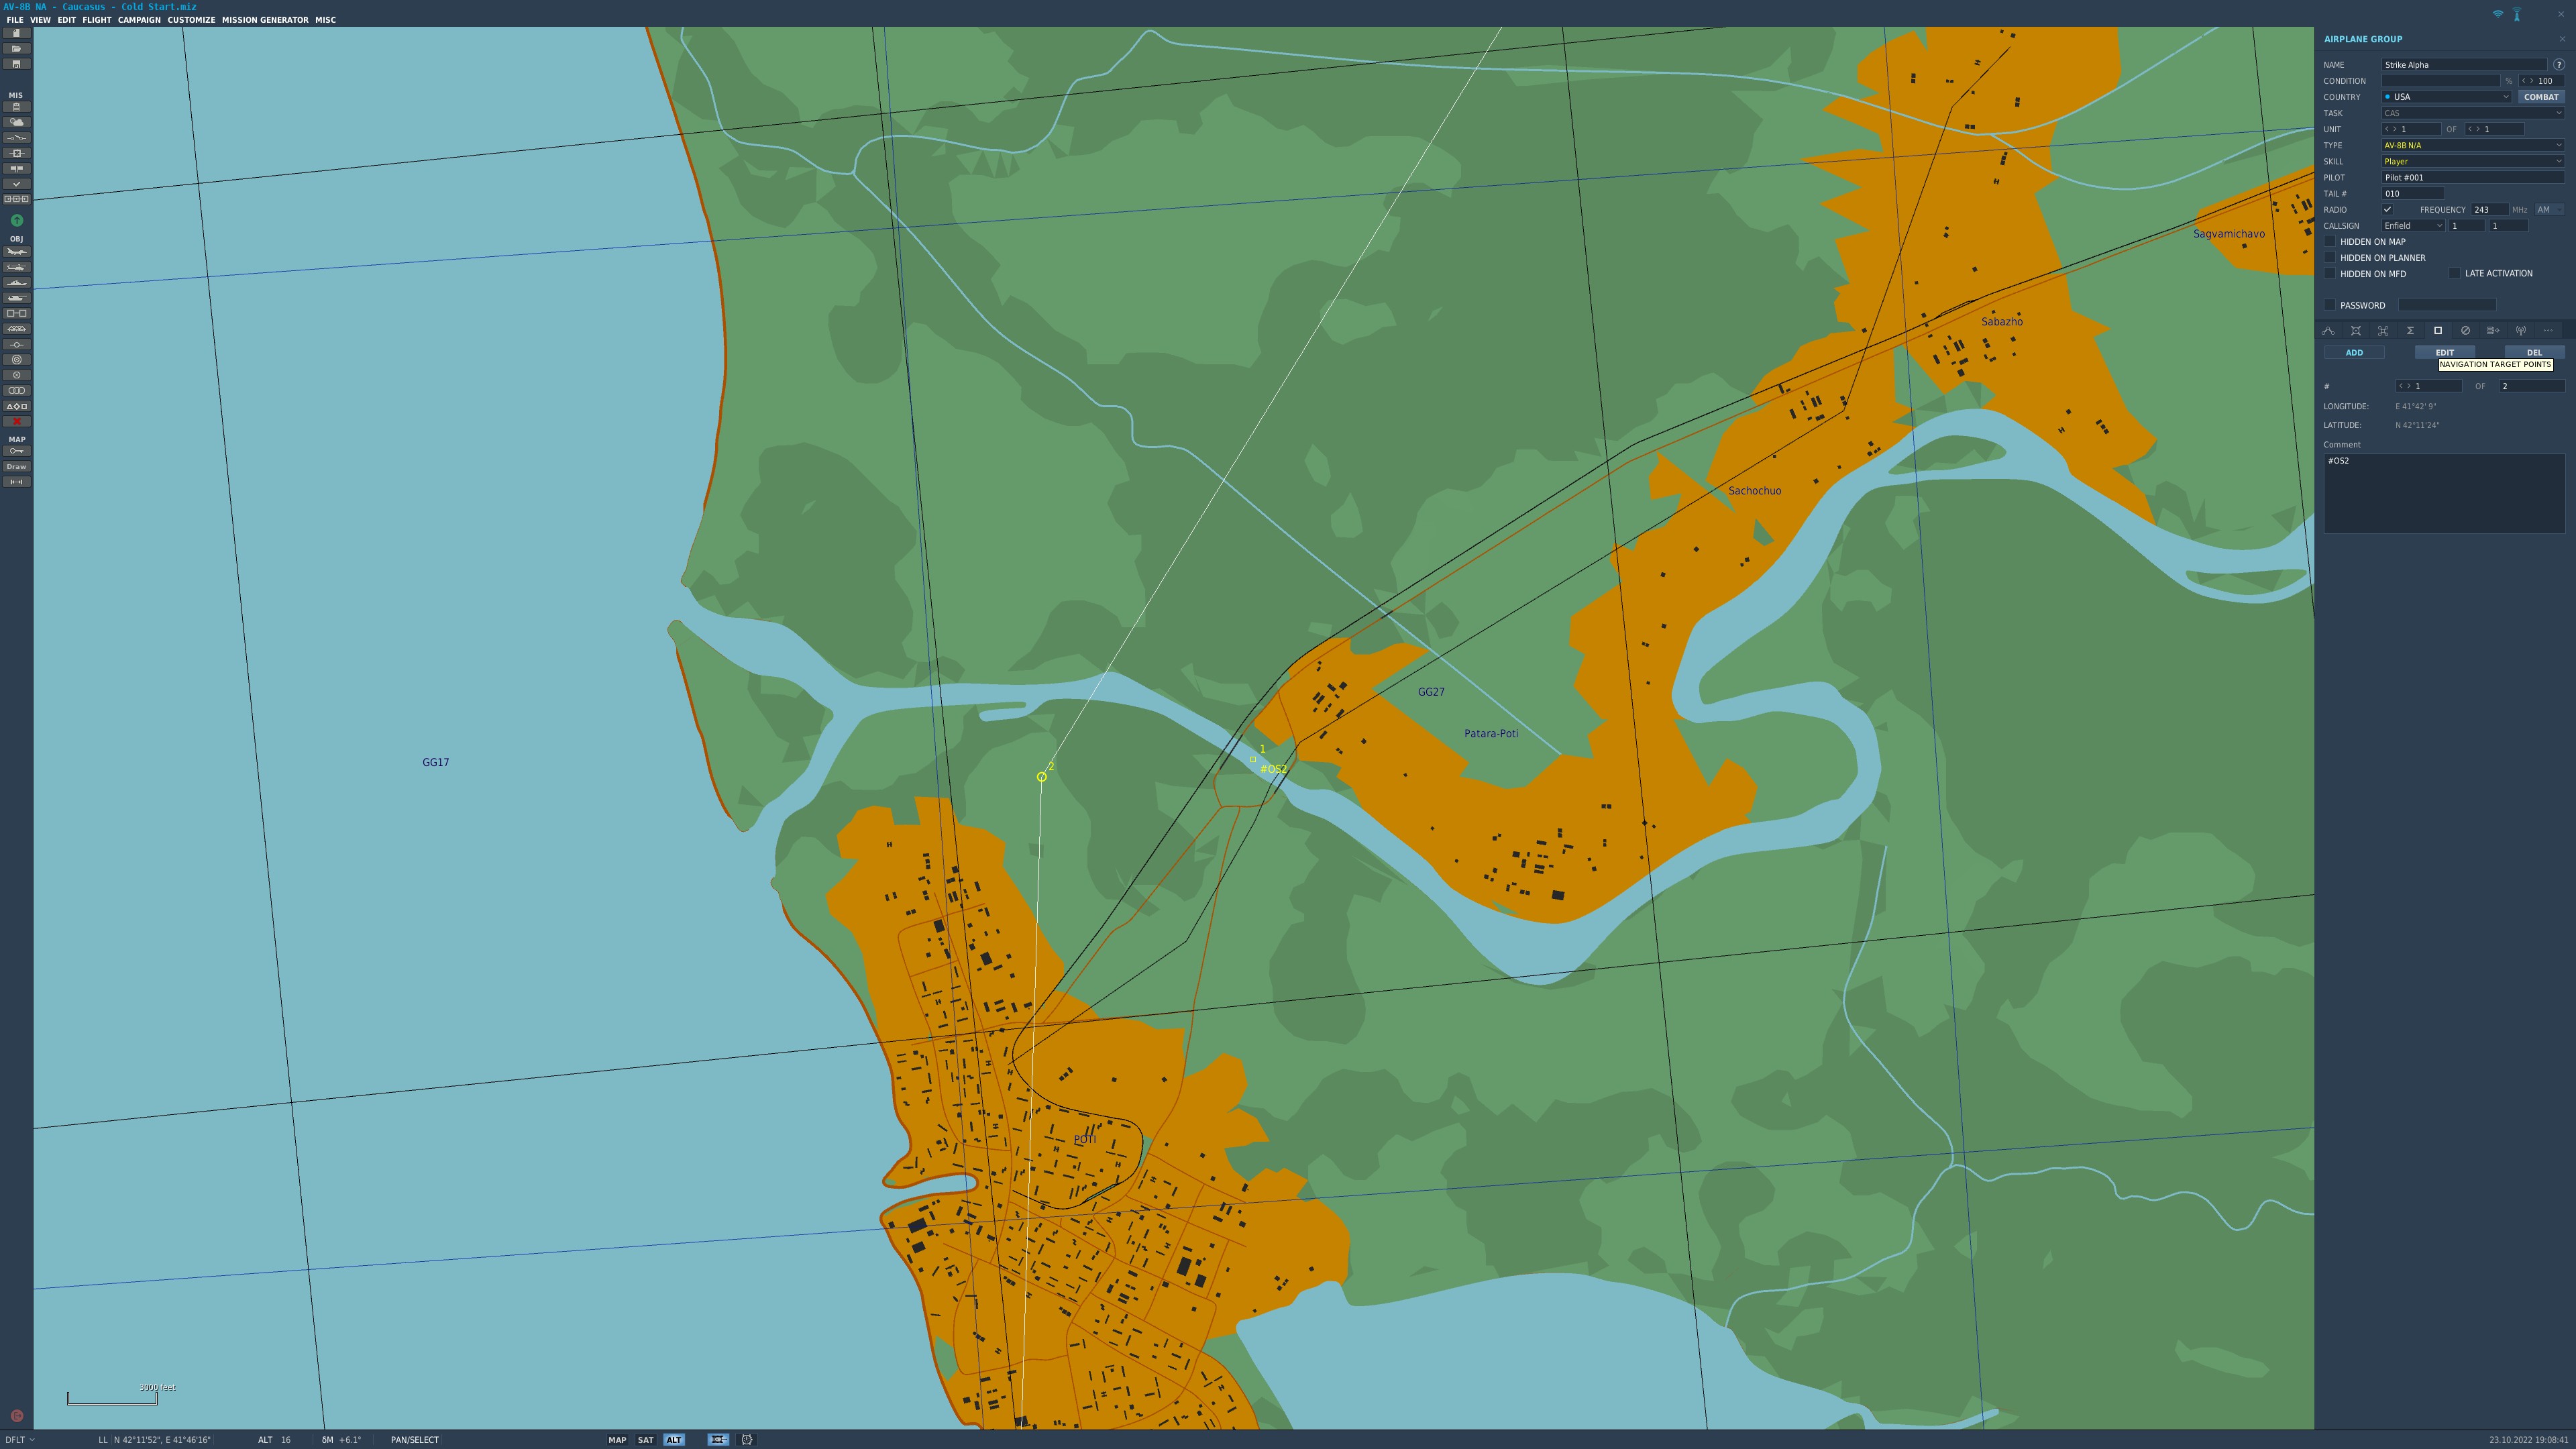
Hello folks! The way how waypoints offsets are created in the mission editor has been reworked. Previously you had to create a WAYPOINT PROPERTY and then add a bearing/range pair. Now it is a point and click method. 1. The NAVIGATION TARGET POINT tab has been activated in the Mission Editor. This means that the WAYPOINT PROPERTIES tab is no longer required. null2. To add a waypoint offset, all you have to do is go to the NAVIGATION TARGET POINT tab and click on the ADD button. Afterwards just click the spot on the map where you want the offset. 3. In the comments section you must write #OS<waypoint number>, that way the point that was created will be linked to the specified waypoint. 4. You can add as many offsets for the same waypoint as you want, but only the last one will be saved in the mission file. Note: The comment section will not be cleared when you create a new waypoint, so please be aware that you set the correct waypoint number. The only way to avoid this is to go back to the Waypoints tab before entering a new offset.
-
ROUTE navigation, formerly known as NSEQ navigation, allows the Harrier to fly a subset of the mission flightplan. There are three types of Routes, although only two are enabled: 1. SEQ: Sequential, in which a route is created following all the waypoints sequentially to a selected terminus. 2. NSEQ: Non sequential, in which a route is created by programing a sequence of waypoints. These waypoints do not need to be in sequential order. 3. RSEQ: Not enabled in the real aircraft. Creates a sequential route similar to the flight plan by using the GPS, HOW TO create a ROUTE 1. Select the EHSD Data Page. 2. Select the NSEQ option (PB11) 3. The ODU will show the following options: ODU 1: IGRS, ODU 2: EGRS, ODU 3: TERM, ODU 4: PROG, ODU 5: RSET. 3.1 IGRS: Creates a non sequential ingress route TO a target. The last entry is considered to be a target. If the last entry has a n offset, the offset it the last navigation point. 3.2 EGRS: Creates a non sequential egress route FROM a target. The first entry is the last IGRS point (if it exists). The last entry is considered the HOME waypoint. 3.3 TERM: Creates a sequential flight route from the aircraft position to the selected terminus waypoint or designated targetpoint. If no targetpoint was designated, the terminus waypoint is considered to be the target. If the waypoint has an offset, the offset is considered to be the end point. 3.3 PROG: When selected enables the programing of a route. 3.4 RSET: Clears the selected route. 4. Seelct the route to be created by clicking on ODU buttons 1 to 3. The selected option will be colonized (a colon will appear). 5. Click on the PROG ODU button. 5.1 The ODU will change to the following options: ODU 1: WYPT, ODU 2: MKPT (Only for IGRS and EGRS), ODU 3: TGPT, ODU 4: PROG (it will be colonized), ODU 5: Seelcted route option (IGRS, EGRS or TERM). 5.2 ODU 1 to 3 indicates the ype of steerpoint that will be used to create the route. By default WYPT is colonized, meaning that waypoints will be used. 5.3 Select the type of steerpoint: Waypoint (WYPT) {DEFAULT}, Markpoint (MKPT) [only for IGRS and EGRS} or Tragetpoint (TGPT). 5.4 The UFC scratchpad will show the last enterd waypoint. 0 if the route is empty. For IGRS and EGRS, the EHSD will show the routes selected waypoints. IGRS route is on top, EGRS route is at the bottom. 5.5 For TERM routes, a waypoint is required. You can also select a targetpoint, but the route will be createf to the terminus waypoint and then to the targetpoint. 5.6 YOu can change the type of route by clicking on ODU 5. Its label will cycle from IGRS to EGRS to TERM back to IGRS. 6. When you have finished, click on the EHSD DATA button. HOW TO use a ROUTE 1. ROUTE can only be selected when the aircraft master mode is not in AG (NAV, VSTOL or AA). 2. In the EHSD navigation page select the ROUTE option (PB10) 3. The ODU will show the available options: ODU 1: SEQ (DEFAULT and always available), ODU 2: NSEQ (Available only if an IGRS and/or an EGRS route has been defined), ODU 3: RSEQ (Not available) 4. Select the option in the ODU. 4.1 The selected option will be colonized. 4.2 The ROUTE button label will change to the selected route option: SEQ oe NSEQ and it will be boxed, indicating that it is active. 4.3 The route will be shown in the EHSD map. 4.4 For NSEQ routes, the IGRS route will be a solid dark purple line. The EGRS route will be a dashed purple line. 5. Pressing the SEQ or NSEQ boxed button will unbox it. The legend will change to ROUTE and the route navigation will be disabled.
-
I have added a note regarding the iN RNG HUD advisory
-
The AGM-65F remains as an authorized load. You can still use it.
-
Yes. You can uncage from any page that selects a weapon. No. If you select the TPOD after selecting a F or an E, the missile is deselected. You will have to select the maverick again. That manual has ben superseded by more current docs. TPOD video is replaced by Maverick video. Yes. All selected missiles of the same type will be spooled up. Selection energizes all pylons holding the same weapon. Missile seekers spool up as soon as powered and spool down when unpowered. That is why if you deselect them, they will need to spool up when reselected. AGM-65E2 video runs on the back of TPOD video. So it is not shown. That is what the manual says as a warning. That the E2 is active ALL the time when selected, even if no video is being shown. That is another warning in the manual. If the TPOD is in Station 4 there is a high probability of the E2 seeker locking on the TPOD. That is why you first UNCAGE the missile and then fire the laser. If the missile has locked on the TPOD you must cage it, stop the laser, uncage the missile and fire the laser again. I don't have the answers. I am just following the procedures as indicated in the manual. 1. The E2 can be used with the TPOD. 2. TPOD video will be on top of MAVERICK E2 video, so only TPOD video will be shown. 3. SSS FWD > 0.8 will put E2 video on top of TPOD video for 14 seconds. 4. E2 is active ALL the time it is selected. It can be caged/uncaged and fired without video. 5. E2 can lock to the TPOD sensor instead of the laser spot. 4 and 5 are WARNINGS in the manual. Note: The AGM-65F procedures are copied from the E procedures since F is no longer used in the USMC. This is a document detailing changes made to the Mavericks and its use with the TPOD. CHANGES TO AGM and TPOD AV-8B.docx
- 59 replies
-
- 10
-

-

-
The AV-8B NA in DCS can use the following AGM-65 Maverick variants: AGM-65F: IR homing missile. Does not require external sources to lock on target. AGM-65E & AGM-65E2: Laser guided missile. Requires an external source to “paint” the target with a laser designator. In DCS the AGM-65E2 is named AGM-65E2/L (E2 for the US Navy, L for the USAF). Global Properties and Limitations: Only Inner and Middle pylons can carry Mavericks. Aircraft can only carry one missile per pylon. All missiles can be selected and uncaged from the EHSD and RWR pages. Maverick Video will replace the current page when the missile is active. Laser Mavericks must spool up its gyros before it can be used. This process takes 30 seconds for the E and 90 seconds for the E2. During this time the missile cannot be uncaged nor fired. The gyros will remain spooled as long as the missiles are selected. Deselecting and selecting again will require that the gyros spool up again. AGM-65F and AGM-65E Properties Limitations: Mavericks cannot be used at the same time with the TPOD. If the TPOD is active, Maverick video will replace TPOD video when the missile is active. If the TPOD is selected after selecting a Maverick, the missile will be deselected. AGM-65E2 Properties and Limitations: Maverick can be used at the same time with the TPOD. If the TPOD is active. TPOD video will remain active all the time. If the TPOD is selected after selecting an E2, TPOD video will replace Maverick video. When a TPOD is used, the missile will run in the background fully capable of being caged/uncaged and fired at any time. When self-lasing with a TPOD, it is possible for the E2 seeker head to lock onto the TPOD sensor head instead of the target spot if the TPOD is in Station 4 (Centerline). AGM-65E2 Self-Lasing procedures: To prevent self lock the following procedure must be followed when self-lasing: 1. Designate target with the TPOD. Adjust designation as needed. 2. Uncage the E2 missile. 3. Fire the laser at the target. 4. Press WINC for more than 0.8 seconds to steer to T0. 5. Fire the missile when ready. When in the TPOD page, if pressing Sensor Select Switch (SSS) Forward for more than 0.8 seconds, the Maverick video will replace TPOD video for 14 seconds. The TPOD laser will continue painting the designated target. After 14 seconds, TPOD video replaces Maverick video. NOTE: Laser Maverick video only shows sensor head position. It does not show external views unlike IR Maverick video. HUD "IN RNG" Advisory Any AGM-65 (F, E or E2) target is NOT an aircraft system target. Because of that, the aircraft cannot determine range to target. The IN RNG (In Range) advisory that appears in the HUD is only available if there is a system designated target (via DMT, TPOD or INS). In this case the range to target will be calculated FROM the aircraft TO the designated target, NOT to the maverick target.
- 59 replies
-
- 26
-
-
-
Thanks. I'll check this ASAP.
-
Folks, On the next update the TPOD Laser arming requirements will be fully active. The requirements have been there from the beginning but were not working. That has been fixed. If the requirements are not met you cannot set the laser to ARMED. If ARMED, either FIRING or not, if the conditions are not met the laser will be turned off and safed (SAFE showing in PB06). These are the conditions: Landing Gear UP Airspeed > 100 KCAS Master Arm: ARM Master Mode: AG TPOD SWFOV mode: OFF TPOD must be either Area or Point Locked or be slaved to a System Designation. Please keep this list in mind after the next DCS update.
-
The knobs are on the HUD control panel, between the HUD mode and Altimeter mode switches. From left to right: BRT and CONST
-
I discussed this at large with him. And he confirmed, no DESG, no AUTO. CCIP to AUTO conversion indeed does not require DESG but that is because in this case the target is the CCIP spot on the ground. I can't explain why it should be this way, but that is how our SME described how it works. In fact, he gave us his SOP: When nearing the IP press DESG and designate the IP as the target. Then use the TPOD to search for the true target and select it. EHSD will go into DESG TGT. Do a Long Winc and EHSD will go back to DESG STP. I also asked about the NWS switch and its functionality is more complex than before: - WIth an operational TPOD: - It slaves TPOD to designated target (if it exists). Next press will undesignate. - If no designated target: It slaves the TPOD to the VV (like the DMT). - Press again, and it sets the TPOD into SNOWPLOW mode (fixed elevation and azimuth). But I will tell him your observations.
-
Unfortunately in the latest updates (2010 and newer) the targeting system changed. Now it is a requisite for an AUTO release to set the EHSD in DESG mode. This indeed will set the current steerpoint (waypoint, markpoint or targetpoint) as the selected target. The EHSD will show DESG STP, and AUTO calculations will be performed. If you then select another target, using any onboard sensor, the EHSD will show DESG TGT. This means that the aircraft is STILL navigating towards the selected steerpoint but the target is elsewhere. AUTO calculations will be performed on the new target position but the aircraft will keep navigating towards the steerpoint. You must long press Waypoint Increment, that will set the new target designation as Targetpoint 0 and then it will change the steerpoint from its current selection to T0 (Targetpoint 0) and the ESHD will go back to DESG STP, meaning that both the target and steerpoint are the same. In any case, no AUTO calculation is performed unless the INS is prepped by setting the EHSD in DESG mode. BTW, the EHSD is now considered another targeting sensor: MAP.